P4V, the Perforce Visual client, is Perforce's cross-platform graphical user interface. You can use P4V on Windows, Macintosh, UNIX and Linux computers and benefit from an identical interface regardless of platform. This introductory guide provides some Perforce basics and an orientation to P4V's layout and features. For more details about P4V, consult its online help. To learn more about Perforce, consult the user documentation on our Web site.
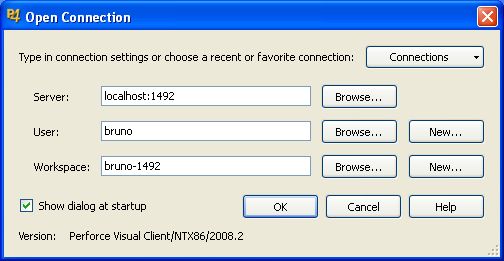
To use Perforce to manage files, you typically connect to a Perforce server using a client program like P4V. P4V enables you to check files in and out, and perform the various other necessary tasks. The following sections tell you how to perform basic tasks and point out powerful features and shortcuts.
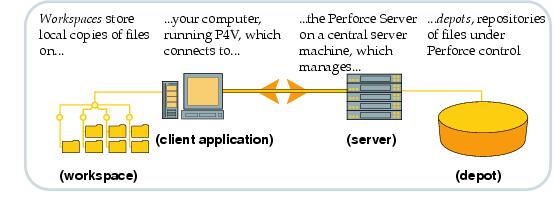
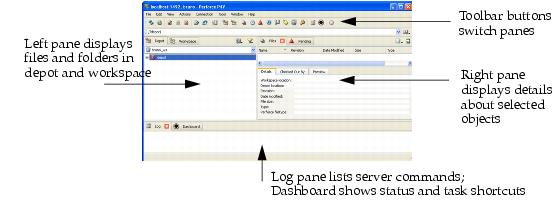
P4V connects your computer to a Perforce server to move files between Perforce
depots and your
workspace, as shown below.
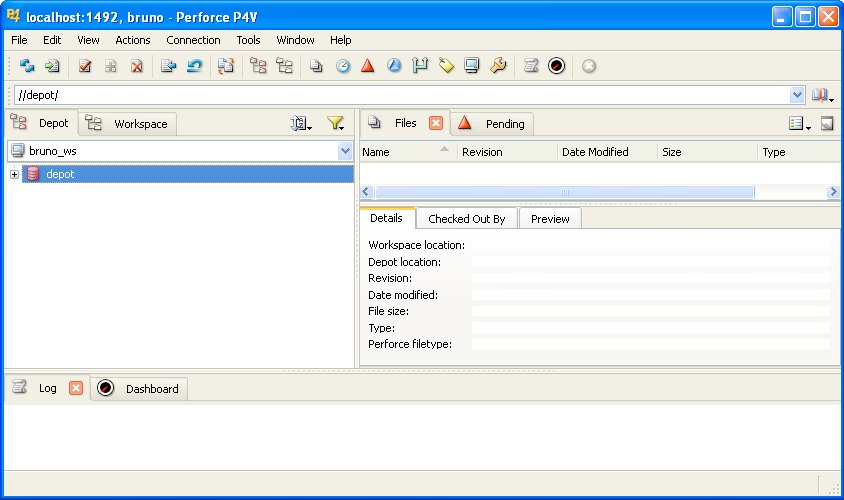
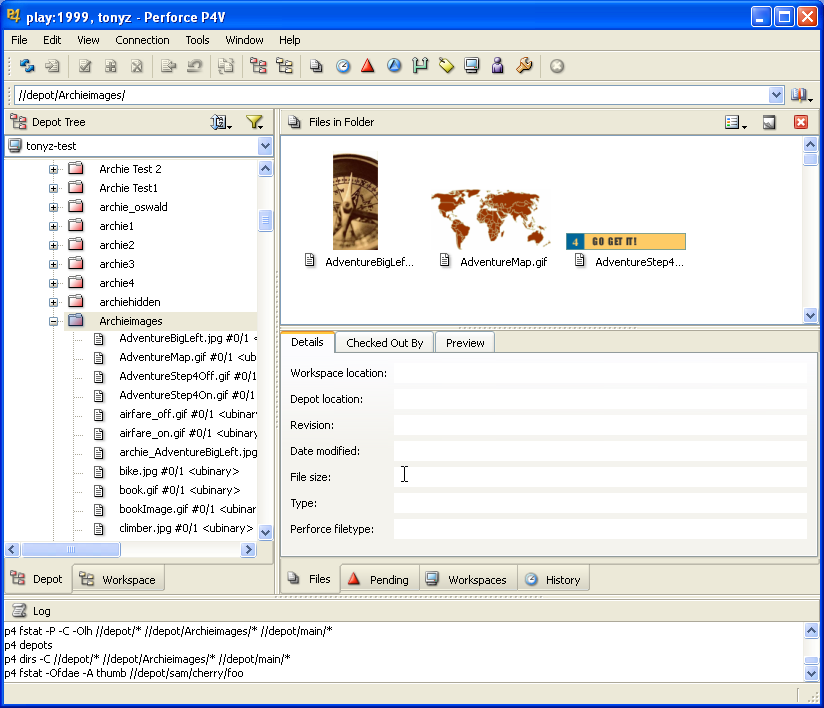
The following figure points out the panes and important features of the main screen. To see what a button or screen element does, hold the mouse cursor over it. P4V displays a descriptive tooltip.
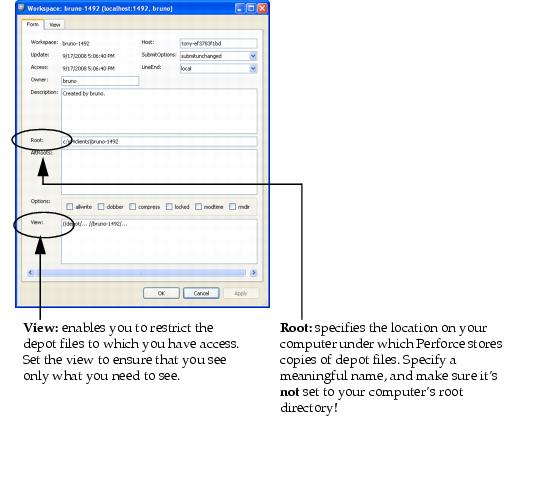
Your Perforce administrator can do this for you, but it's advisable to learn a few important aspects of configuring your workspace, specifically (1) configuring the client root directory and (2) configuring the client view.
To define a workspace, choose and, when prompted, enter a name for the workspace. To edit your current workspace specification, choose
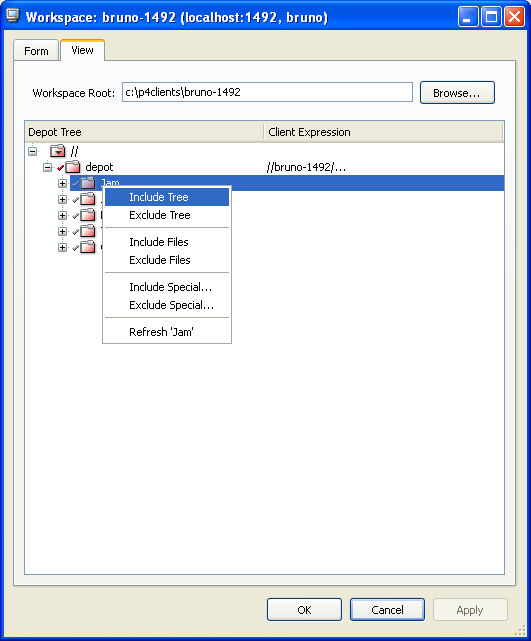
To display and set the client view graphically, click the tab. Browse to desired files and folders and context-click to include them or exclude them from the client view, as shown in the following figure.
p4 sync //depot/Misc/manuals/...#head //depot/Misc/manuals/recommended_configuration.doc added c:\p4clients\bruno-1492\Misc\manuals\recommended_configuration.doc //depot/Misc/manuals/triggers.doc added c:\p4clients\bruno-1492\Misc\manuals\triggers.doc //depot/Misc/manuals/vendor_branches.doc added c:\p4clients\bruno-1492\Misc\manuals\vendor_branches.doc Sync copied 3 files to workspace (including 3 that were added) Sync removed no files from workspace Sync completed with no warnings or errors.
|
Note that, when you check out a file, Perforce adds it to a changelist, which is a list of related files. You can use changelists to group related files, for example, all files that contain changes required to implement a new product feature. To view the changelist, choose or click
in the toolbar.
To edit a checked-out file, double-click it (or context-click it and choose , then select the desired application). P4V launches the corresponding editing application. Make changes and save the file.
To select an application with which to open a file, choose Note that you can configure editors for different file types by choosingand clicking the tab.
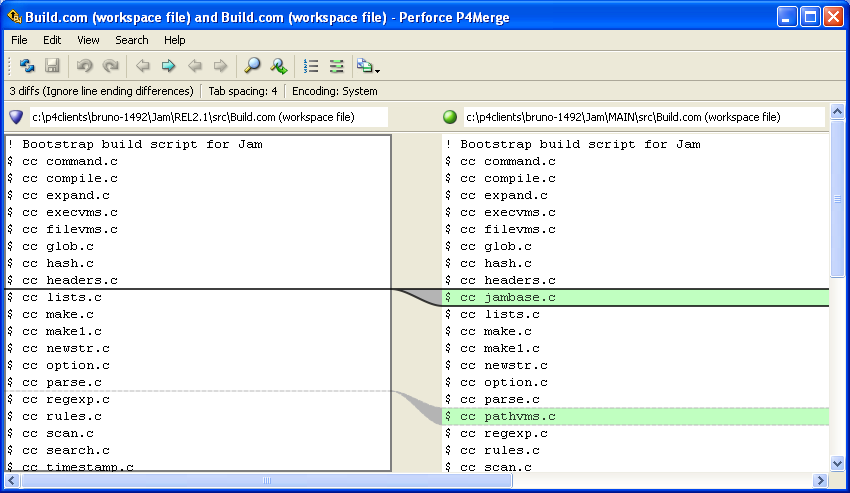
To enable you to see what changes you've made, you can compare (diff) your edited file with the version you checked out. To diff, context-click the checked-out file in the left pane and choose Diff . P4V launches P4Diff, displaying the differences between the two files. For example:
|
2.
|
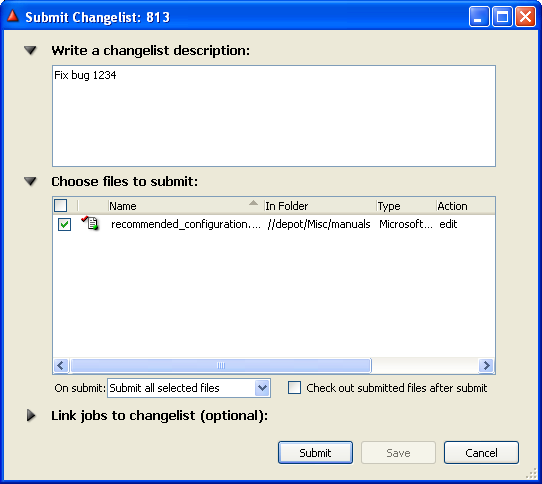
Click . In the Log pane, P4V displays a message like the following:
|
|
1.
|
Display pending changelists: click  in the toolbar. P4V displays a list of pending changelists, as shown in the following figure. To display the files in a changelist, expand it 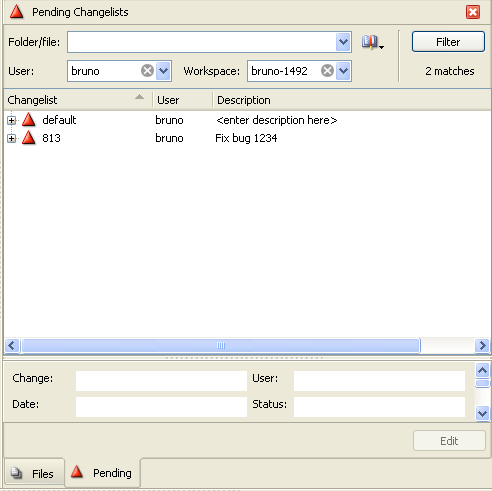
|
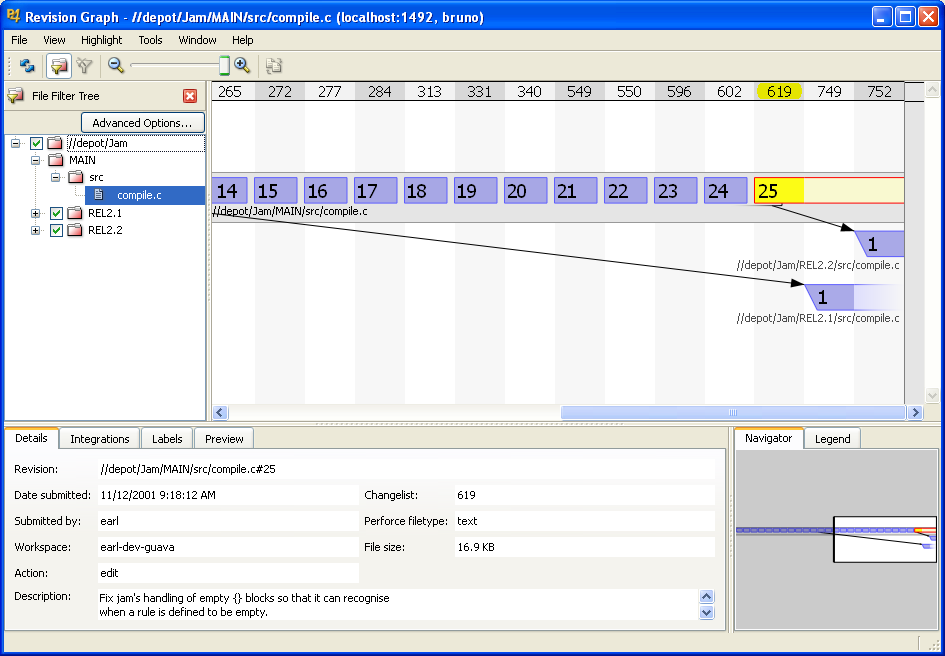
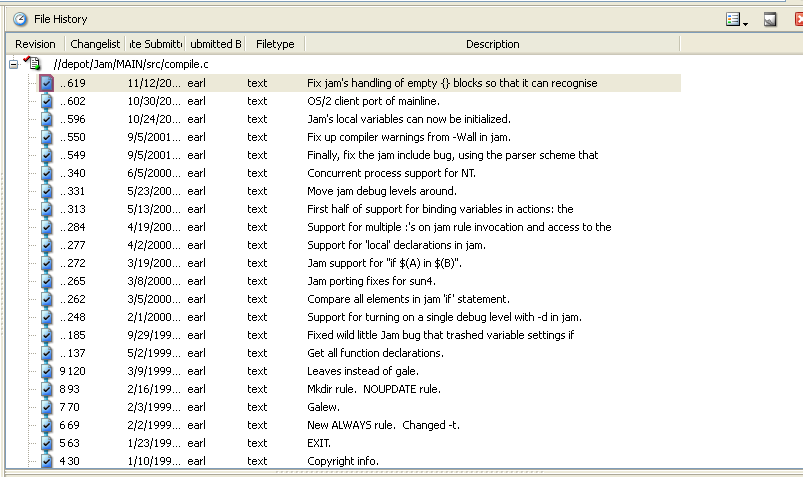
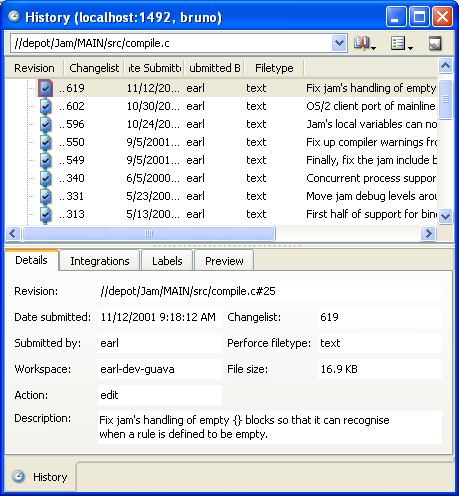
To view the changes made to a file or folder, context-click the file or folder and choose or . The history for the selected file or folder is displayed in the right pane. For example, the following figure shows the history of a folder, listing every submitted changelist that affected a file in the folder.
This diagram shows you when the file was created and how it was branched, and enables you to view details about each version submitted to the depot and navigate through the graph using the navigation map. For more details about the information displayed in the revision graph, consult P4V online help.
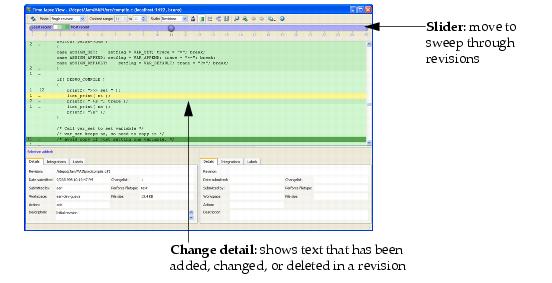
Using Time-lapse View, you can sweep through all revisions of the file using the slider, noting when changes were made and who made them. Again, for details, consult P4V online help.
P4V displays the changes as shown in the following figure. This example shows that, between the selected revisions, a file was edited and checked in. File highlights are color-coded to indicate additions, changes, and deletions. Expand folders and scroll to locate changes of interest. To skip to the next or previous change, click the right and left arrows
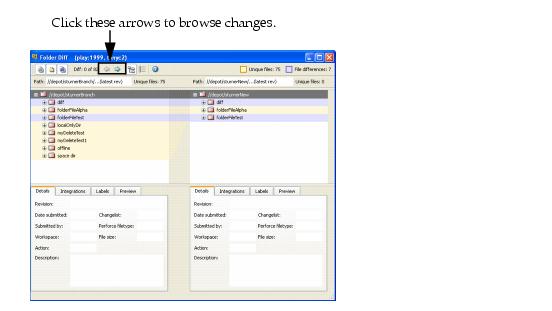
.
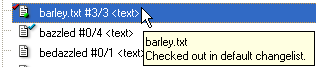
P4V provides tooltips for many objects on the screen. For example, to display the status of a file, hold the mouse cursor over the file in the left pane. P4V displays a tooltip like the following one.
Another example: to display a changelist description, click  in the toolbar and hold the
 mouse cursor over the changelist in the right pane. There are tooltips for all the P4V buttons, too.
P4V provides drag and drop shortcuts for common tasks. Drag and drop can simplify operations on large groups of files. For example, to check out all the files in a folder, drag the folder to a changelist. To diff two files, drag one to the other. For details about drag and drop shortcuts, refer to the P4V online help.
If you use Perforce to manage graphics files, P4V's thumbnail views enable you to preview the files. To display thumbnails, click the Files tab in the right pane, then select the desired thumbnail size from the title bar
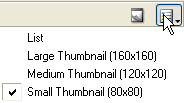
.
To keep a tab open, you can undock it. For example, context-click a file and choose File History, then choose . P4V opens a separate window for it, as shown in the following figure.
To configure P4V, choose . The tabbed dialog is displayed. In particular, the tab enables you to associate applications with file types, overriding any operating system associations. The Diff and Merge tabs enable you to configure external applications, in case you prefer tools other than those that are bundled with P4V.
This guide helps you to start working with files using P4V and points out important basic features, but P4V enables you to do much more: create jobs, branch groups of files, and handle file conflicts that arise in team development settings.
Perforce administrators can perform administrative operations by choosing . Using the Administration tool, superusers can manage users and groups, and their access to files and folders within the depot. Some administrative functions must still be performed using the Perforce command-line client (
p4). For details, see the
Perforce Command Reference and the
Perforce System Administrator's Guide.
To get the whole picture, read the P4V online help, Introducing Perforce and the
Perforce System Administrator's Guide. The guides, which are available from the Perforce web site, describe the full set of features that the Perforce Server provides. Perforce Technical Support is always ready to help you, and there's a thriving community of Perforce users active on the
perforce-users mailing list. Consult our web site for details.
Copyright 2005-2009 Perforce Software.


Before you can edit the file, however, you must check it out.