The Perforce JavaScript API for Visual Tools enables you to extend P4V, Perforce's Visual Client, and P4Admin, Perforce's Administration Tool, using applets written in JavaScript and HTML. Your applets can take full advantage of the capabilities offered by JavaScript and the World Wide Web. For example, you can incorporate Google charting widgets into a tab to graph data. Specifically, you can:
|
•
|
Create a custom dialog: you can replace the P4V dialog with one of your own design.
|
If you have multiple Perforce servers, you can use one of them to serve applets and configure the other servers to refer to the central server. You can tailor applets for specific Perforce users and groups. The following sections describe the Perforce JavaScript API for Visual Tools in detail.
P4V and P4Admin use the Qt toolkit as the basis of their cross-platform user interface. Qt-based applications incorporate the open source WebKit HTML rendering engine. The Perforce JavaScript API for Visual Tools uses WebKit to enable you to create applets that extend P4V and P4Admin. Applets are implemented using the following components:
P4V and P4Admin call the central settings file according to internal application logic, providing a key to be processed. In the central settings file, you configure extensions by detecting the keys of interest and specifying the JavaScript or HTML files to be executed or rendered.
|
2.
|
Perforce administrators: In your Perforce server, create an entry for the central settings file in the permissions table (using the p4 protect command or the Administration Tool).
|
|
4.
|
All users: In P4V or P4Admin Preferences, enable the preference on the tab, add the Perforce server to the list of allowed servers, then exit and relaunch the application.
|
To add the required centralsettings entry to the permissions table:
|
1.
|
Click the tab. The permissions table is displayed in a grid at the bottom of the pane.
|
|
4.
|
Click to save your entry.
|
The central settings file is a JavaScript file that processes keys and returns the location of the HTML or JavaScript files to be executed for tabs and alerts. It can contain per-group and per-user logic and can point to files in other Perforce servers. To configure the central settings files for a Perforce server, you make one or more entries in the Perforce permissions table. To receive applets, users must have
read access to the central settings file.
The following sections provide details about configuring, coding, and administering the central settings file. For details about administering permissions, refer to the
Perforce System Administrator's Guide.
To add applets, you create a function that returns the applet that is to be executed, branching according to the key that P4V or P4Admin passed to the central settings file. For alerts, return JavaScript files. For tabs, return HTML files. The files can reside on the local filesystem, in a Perforce server, or on the Web, as follows:
|
|
|
|
|
|
|
|
p4://[user@][server[:port]]/files/depot-file-path
|
|
|
|
Finally, you include a line of code that executes the function to process the key passed by the Administration Tool.
Important: This function call must be the last line of the central settings file.
Following is an extremely basic central settings file that adds a tab to the Perforce Administration tool. The contents of the tab are determined by the specified HTML file.
function settings(key) { if (key == "p4admin_mainTabs") return ["p4://admin@perforce:1667/files/depot/jsapi/mytab.html"];
|
You can configure different central settings files on a per-user or per-group basis, for example, to provide different tabs for different users. One approach is to make separate entries in the permissions table for each group or user. For example, the following entries configure different tabs for developers and for artists.
Another approach is to specify the per-user or per-group logic in the central settings file itself. For example, the following logic ensures that users Tony and Herman each see their own tab, while other users see the default tab:.
{ if (key == 'p4admin_mainTabs') { if (user == "tonyz") return ["p4:///files/depot/jsapi/tony.html"]; else if (user == "herman") return ["p4:///files/depot/jsapi/herm.html"]; else return ["p4:///files/depot/jsapi/default-tab.html"]; } }
|
To issue Perforce commands, use the p4() method. For example, to obtain a list of open jobs:
var changeNumber = 'new';var changeClient = 'bruno_ws'; var changeUser = 'bruno'; var changeStatus = 'new'; var changeDescription = 'Sample P4JsApi change.'; var changeSpec = 'Change: ' + changeNumber + '\n\n' + 'Client: ' + changeClient + '\n\n' + 'User: ' + changeUser + '\n\n' 'Status: ' + changeStatus + '\n\n' + 'Description:\n' + ' ' + changeDescription + '\n'; P4JsApi.p4('-u bruno -c bruno_ws change -i "' + changeSpec + '"');
|
For long-running commands that you want to run asynchronously (to enable users to continue working instead of waiting for the results to be returned), specify a callback function to process the results. If you run the command asynchronously, an empty object is returned by the
p4 method and results are returned to the callback function when the command completes. For example:.
/* Run the "p4 info" command with a callback function. * When the command is received by the p4 server, * its data will be returned to the 'myInfoCallback' function. */ function myInfoCommand() { P4JsApi.p4("info", myInfoCallback); } /* Callback function for myInfoCommand(). * Access the returned data contained in the 'arguments' array. * The data array contains the information that is returned by the * command that is run by the calling function. */ function myInfoCallback() { // The 'data' array might have more than one element. var info = arguments[0].data[0]; alert( info.userName );
|
var jobJSON = { 'Job' : 'new', 'Status' : 'open', 'User' : 'randy', 'Date' : '2010/08/10', 'Description' : '\n\tNew feature request: add 3D rendering\n' };
|
The JavaScript API controls the p4 commands that can be executed, to maximize security. For a complete list of supported commands, see
Method and Command Reference.
|
•
|
data: an array of objects composed of name/value pairs.
|
|
•
|
size: the number of objects in the data array.
|
|
•
|
error: Client error message, if any (for example if an invalid command is given)
|
|
•
|
info: Client info message, if any
|
|
•
|
text: Results of command, returned for the diff2 and print commands
|
|
•
|
binary: Returned if file is binary (also returned for text files if the file's line endings do not conform to the line ending setting for the workspace)
|
Server errors and messages are returned as data rows on the return object data array. For some commands (such as
fstat), the server might return rows of data interspersed with rows of error, warning, and info messages. For example, the
fstat command might return a "No such file" error message. These server error messages are returned as a row in the
data array with a special property of
p4ERROR,
p4WARNING, or
p4INFO. The value of these properties is an object with the following properties, providing more classification information about the message:
|
•
|
message: (text) Description of the problem
|
|
•
|
generic: (integer) Server numeric error code
|
|
•
|
severity: Severity level associated with the message
|
|
•
|
args: An object contain the arguments specified when the command was issued
|
function processP4Result(p4out) { // Errors, warnings and infos coming from server appear in data[], // interspersed with real data // Try to find them and promote to errors.
// Of the statuses that do not represent a valid data returned, map // the possible properties from P4JsApi output to them
var msgTypeMapNonData = { 'p4ERROR': 'ERROR' ,'p4WARNING': 'WARN' ,'p4INFO': 'INFO' } ,statuses = [] ,data = [] ,msgType ,nonDataProperty ,returnObj = { data: null ,statuses: null ,msgMap: { errors: [] ,warnings: [] ,infos: [] ,valids: [] } ,hasErrors: function() {return this.msgMap.errors.length>0;} ,hasWarnings: function() {return this.msgMap.warnings.length>0;} ,hasInfos: function() {return this.msgMap.infos.length>0;} ,hasValids: function() {return this.msgMap.valids.length>0;} };
|
|
|
if (!!p4out.data && p4out.data.length > 0) { for (var i=0, len=p4out.data.length;i<len; i++) { var datum = p4out.data[i]; // assume data is good msgType = 'VALID'; // check if any of the non-data types exist on // the data row for (var mProp in msgTypeMapNonData) { if (datum.hasOwnProperty(mProp)) { // row is not data, but some other msg from server. // save the property in nonDataProperty, and // save the msgType msgType = msgTypeMapNonData[mProp]; nonDataProperty = mProp; break; } } statuses.push( { type: msgType ,subType: msgType == 'VALID' ? '' : datum[nonDataProperty].subType ,severity: msgType == 'VALID' ? 0 : datum[nonDataProperty].severity ,generic: msgType == 'VALID' ? 0 : datum[nonDataProperty].generic ,message: msgType == 'VALID' ? '' : datum[nonDataProperty].message } ); if (msgType == 'VALID') { data.push(datum); } } } // set the status array and data array on the resultObj returnObj.statuses = statuses returnObj.data = data; // from all the statuses collected, put them // in mapped buckets by type on the returnObj so type-based getters // can get them statuses.forEach(function(stat){ switch (stat.type) { case 'ERROR': returnObj.msgMap.errors.push(stat); break; case 'WARN': returnObj.msgMap.warnings.push(stat); break;
|
case 'INFO':
returnObj.msgMap.infos.push(stat);
break;
case 'VALID':
returnObj.msgMap.valids.push(stat);
break;
}
}, this);
return returnObj;
}
// execute the command
var p4out = P4JsApi.p4('fstat //depot/NotARealFile.cc //depot/... -m500');
// process the results, looking for non-data messages
var processedResults = processP4Result(p4out);
// the processedResults object can contain any combination of data, and
// error/warning/info messages. Some error messages are not necessarily
// fatal. Application must determine how to handle interspersed data and
// messages. This simple example logs them to the console.
if (processedResults.hasErrors()) {
console.error('ERRORS: ' + processedResults.msgMap.errors.join('\n'));
}
if (processedResults.hasWarnings()) {
console.log('WARNINGS: ' + processedResults.msgMap.warningss.join('\n'));
}
if (processedResults.hasInfos()) {
console.log('INFO: ' + processedResults.msgMap.infos.join('\n'));
}
// use the data
if (processedResults.data.length>0) {
// handle data response
console.log('got data');
// ...
}
|
If you have an instance of P4Web running, you can take advantage of its display logic by embedding a P4Web URL in your HTML file. To construct the P4Web URL, use a browser to display the desired data. When you have the data displayed as desired, copy the URL to your HTML file. For details about P4Web URLs, consult the discussion of action codes in the P4Web documentation on the Perforce web site:
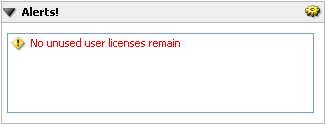
Alerts are visible only to superusers (because users with lower levels of privilege see only the Users and Groups tab). By default, alerts are run when the Administration Tool is refreshed (either automatically by the Administration Tool or manually when you click

). To specify how often the alert is to be run, independent of refreshes, call
startAlertRefreshTimer(). To display an alert, call
addAlert(). To update its text, call
updateAlert() (specifying the alert ID that was returned when you added the alert), and to remove an alert, call
deleteAlert().
To display an image to the left of the alert text, specify the optional image parameter in the call to
addAlert() or
updateAlert(). To specify the image, use the HTML
img tag. To display one of the P4V images provided in the JavaScript API, use the
getImage() method as follows:
P4JsApi.addAlert('Alert text goes here', '<img src="' + P4JsApi.getImage('
Image name goes here') + '" />');
The alert.js file displays alert text:
function testalert(){ var counter = P4JsApi.p4('counter alerttest'); if (typeof alertID == 'undefined') { // add a new alert that will be updated below alertID = P4JsApi.addAlert("Checking counter..."); }
if (counter.data[0].value=='0') { P4JsApi.updateAlert(alertID,"Counter is unset"); } else { if ((counter.data[0].value % 2) == 0) { P4JsApi.updateAlert(alertID,"Counter is even"); } else { P4JsApi.updateAlert(alertID,"Counter is odd"); } } } testalert();
|
This alert calls the getServerSecurityLevel() method to check the security level of the Perforce server, and displays an alert if the level is lower than level two.
function securityAlert(slevel) { if (slevel == 0) P4JsApi.addAlert ('Security level set to the lowest level: ' + slevel); if (slevel == 1) P4JsApi.addAlert ('Security level too low: ' + slevel); } securityAlert(P4JsApi.getServerSecurityLevel());
|
The Perforce JavaScript API for Visual Tools enables you to add up to 25 tabs to the P4Admin and P4V main windows. After you add custom tabs, uses can display them by choosing them in the menu.
The following examples illustrate some approaches to coding tabs. Because the tab is essentially a WebKit HTML browser, you can code almost anything that a standard browser can render.
if (key == "p4admin_mainTabs") { return ["C:\\jsapi\\Tab1.html","C:\\tmp\\Tab2.html","C:\\tmp\\Tab3.html"]; }
|
<html><head> <title>Current Settings</title> </head> <body> <script type="text/javascript"> content = '<H1>Current Settings</H1>' + '<p><b>Port:</b> ' + P4JsApi.encodeForHTML(P4JsApi.getPort()) + '<p><b>Client workspace:</b> ' + P4JsApi.encodeForHTML(P4JsApi.getClient()) + '<p><b>User:</b> ' + P4JsApi.encodeForHTML(P4JsApi.getUser()) + '<p><b>Charset:</b> ' + P4JsApi.encodeForHTML(P4JsApi.getCharset()) + '<p><b>Server version:</b> ' + P4JsApi.encodeForHTML(P4JsApi.getServerVersion()) + '<p><b>Unicode?:</b> ' + (P4JsApi.isServerUnicode()=="true" ? 'Yes' : 'No') + '<p><b>Case sensitive?:</b> ' + (P4JsApi.isServerCaseSensitive()=="true" ? 'Yes' : 'No') + '<p><b>Security level:</b> ' + P4JsApi.encodeForHTML(P4JsApi.getServerSecurityLevel());
document.write(content); </script> </body> </html>
|
The following example displays the five most recent submitted changelists in a simple table. The code in the central settings file specifies the HTML file to be invoked when the settings method is invoked with the
p4admin_mainTabs key as an argument. The latest_changes.html file, which resides in the specified path in the depot, queries the server for the five most recent changelists, builds the table that contains the data, then displays the table.
function settings(key) { if (key == "p4admin_mainTabs") { return ["p4:///files/depot/jsapi/latest_changes.html"]; } }
|
<html><head> <title>Five Latest Changes</title> <script type="text/javascript"> function getLast5Changes() { // get latest changes. changes = P4JsApi.p4("changes -l -m5"); // add changes to table table = document.getElementById('changes'); for (var i=0; i<changes.size; i++) { var change = changes.data[i]; var row = document.createElement("tr"); row.innerHTML = "<td>" + P4JsApi.encodeForHTML(change.Change) + "</td>" + "<td>" + P4JsApi.encodeForHTML(change.User) + "</td>" + "<td>" + P4JsApi.encodeForHTML(change.Description) + "</td>";
table.appendChild(row); } } </script> </head>
|
To detect user-selected files and folders or to select files and folders from a script, use the getSelection and
setSelection methods. The following example creates a simple tab that exercises both. Note the use of the
p4selection event, which is raised by P4V when the user selects a file or folder in the depot pane..
<html> <head> <link rel="stylesheet" type="text/css" href="table.css" /> <script type="text/javascript">P4JsApi.setWebKitDeveloperExtrasEnabled(true);</script> <script type="text/javascript"> function reportSelection(v) { var sel = ""; for (var idx = 0; idx < v.length; ++idx) sel += v[idx] + "<br>"; document.getElementById("currentSel").innerHTML = sel; }
function selectPaths() { var pathlist = document.getElementById("paths").value; var paths = pathlist.split(','); var selList = []; for (var idx = 0; idx < paths.length; ++idx) { var path = paths[idx].trim(); selList.push("p4:///files" + path); }
P4JsApi.setSelection(selList, function(v) { console.log('completed: ' + v); });
</script> <title>Selection test</title> </head> <body onLoad="reportSelection(P4JsApi.getSelection());"> <div>Paths to select (comma separated): <input type="text" id="paths"><a href="javascript:selectPaths();">GO</a></div> <div><a href="javascript:reportSelection(P4JsApi.getSelection());">Current selection:</a><div id="currentSel"></div></div> </body>
|
To replace the standard P4V dialog with your own customized version, add logic to the central settings file specifying the HTML file that defines the custom dialog. Your custom dialog can include logic, for example, to include information from a defect tracker. To submit the changelist, use the
P4JsApi.p4 method to issue the
submit command.
For more information on custom dialogs (and for more examples), see the
//public/perforce/p4jsapi/examples directory in the Perforce Public depot. Additional information about P4JsAPI can be found in the Perforce Knowledge Base:
By default, P4V users configure performance-related settings (such as the number of minutes between refresh requests) individually. You can use the JavaScript API to override individual settings, which is useful if you have a large number of P4V users connected to the same server and server performance is being affected by the volume of requests.
To override P4V's defaults, you define a variable called P4CentralSettingsJSON in the central settings file, and initialize the variable to the desired settings, using JSON format. For example:
"P4VOverrides" : { "Connection/RefreshRate" : 3, "Connection/MaxChangelistFileCount" : 1000, "Connection/MaxFilePreviewSize" : 100, "Connection/MaxSpecListFetchCount" : 100 }
|
|
•
|
RefreshRate: How frequently P4V or P4Admin polls the Perforce server for changes to displayed information.
|
|
•
|
MaxSpecListFetchCount: For changelist, branch mappings, jobs and labels, configures the number of entries to fetch, specified as a multiple of 100.
|
|
•
|
DisableJobsColumn: Suppresses display of Perforce jobs in the tab. If you do not use Perforce jobs, enabling this option can improve P4V performance by reducing job-related queries that are sent to the Perforce server. The following example shows you how to enable the option.
|
Creating Perforce applets using the Perforce JavaScript API for the Visual Tools is programming using Web technologies. The Perforce JavaScript API offers a variety of features for running applets securely:
Write-protect all HTML and JavaScript files that you use to implement Perforce applets. Your Perforce administrator can assign the minimum required write access to the central settings file and to every entry point (JavaScript or HTML file) referenced by the central settings file. When appropriate, grant write access to developers for specific applet source code files. To ensure that alterations to that source code do not affect other users, you can configure the central settings file so that only the developer can execute them.
Ensure that only superusers (and a minimum number of them) have write access to the central settings file. The central settings file can reside in a Perforce server, in which case access to it is governed by the same permissions as all other depot files.
One possible means of attack is a "hostile" Perforce server: a server that has a central settings file designed to deliver applets that attack the local computer or connected computers. Applets can perform write operations (using the
p4() method) only on primary connections (servers to which P4Admin or P4V is currently connected), so trusted servers are safe. However, an applet might be able to run a long- running read-only command on another server or otherwise disrupt the session.
To prevent this, your users can specify the settings for trusted servers and refuse applets from any other server. To configure trusted server settings, use the preferences tab, or connect to the trusted server and, when prompted, choose . Never connect to an untrusted server with the applet feature turned on, and never accept applets from an untrusted server if prompted to do so.
Monitor your Perforce server to detect unauthorized access. (For details, refer to the discussion of the audit log in the Perforce System Administrators Guide.) If a malicious user gains superuser access to your server, they can modify the central settings file and protections table, and can install applets. (A malicious superuser can cause harm in many other ways, such as obliterating, replaying a journal, creating new superusers, or manipulating protections to exclude current superusers.)
When configuring an entry in the central settings file that points to a Web server (http: protocol), ensure that the Web server is a secure one. If the Web server is not secure, the risk is that a malicious user can change the content on the server to compromise your installation.
Such attacks (also referred to as injection attacks) occur when malicious data or code is embedded in a seemingly safe Web page. To defend your installation against XSS attacks, never put
dynamic data (that is, data returned by a Perforce Server command, entered by users, or originating from any uncontrolled source) in a context where it can be executed. Because the Perforce superuser controls access to the applets that are configured and how those applets transmit data, XSS vulnerabilities can be effectively minimized.
Some JavaScript frameworks provide utility methods for escaping dynamic data. However, do not assume that a framework automatically handles XSS issues. Applet developers might need to implement the logic required to prevent XSS attacks manually.
|
•
|
encodeForHTML(): Use for general HTML, for example, the JavaScript innerHTML method (which sets or retrieves the HTML between the start and end tags of an element).
|
Properties such as innerHTML are not safe, because the text being added is executed. Best practice is to add the HTML as an object. For example:
If you must use innerHTML, escape the data that you are adding. For example:
function escapeHTML(html) { var div = document.createElement('div'); var text = document.createTextNode(html); div.appendChild(text); return div.innerHTML; }
|
<div id="displayText"> </div>
// Example data that can cause attacks var data1 = '<img src="" style="display: none;" onError="alert(\'victim file obliterated\');"/>'; var data2 = "test data here" ; var data3 = "alert('victim file obliterated')";
// Rule: 1 var displayTextDiv=document.getElementById("display text"); displayTextDiv.innerHTML = data1; // insecure displayTextDiv.innerHTML = P4JsApi.encodeForHtml(data1); // secure
// Rule: 2 var inputTag = document.getElementById("textBox"); inputTag.setAttribute("value", data2); // insecure inputTag.setAttribute("value", P4JsApi.encodeForHTMLAttribute(data2)); // secure
// Rule: 3 var errorImgTag = document.getElementById("errorImg"); errorImgTag.setAttribute("onError", data3); // insecure errorImgTag.setAttribute("onError", P4JsApi.encodeForJavaScript(data3)); // secure
|
|
•
|
p4 commands issued by applets are indicated in the server log (flagged as "jsapi" commands).
|
Copyright 2010-2013 Perforce Software.