Walkthrough of development and deployment
The walkthrough illustrates the steps to make your locally developed HTML pages available to your end-users.
Developing your HTML tools locally
You can develop three kinds of HTML Tools, HTML Tabs, HTML Windows, and HTML Actions. The process for all three is similar. We use an HTML Window as an example, which in this case is a custom Submit dialog.This walkthough mentions where HTML Tabs and HTML Actions differ from HTML Windows.
From the Tools menu, we select Manage Tools > HTML Windows.
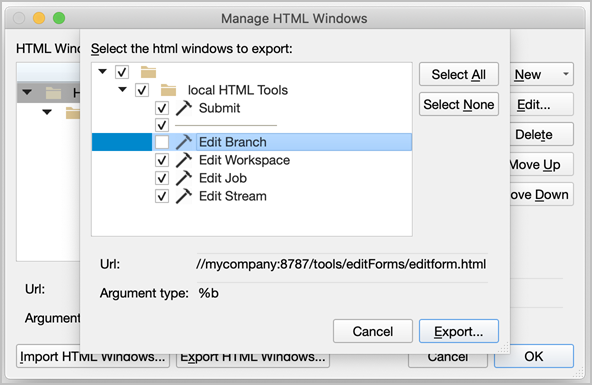
The Manage HTML Windows dialog appears.
Using the Edit button, we specify a local file in the Url: field.
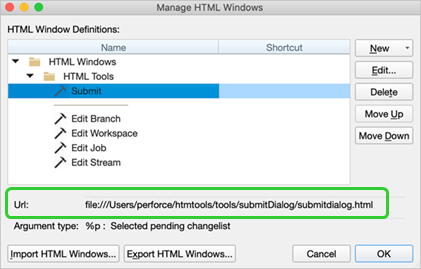
In this case, submitdialog.html represents our custom Submit dialog.
We make sure that each HTML Tool has a URL that points to a local file on our development machine.
Setting up a web server
- We copy the files associated with the tools we developed onto a web server so that, when we are ready, we can make the tools available to our end-users.
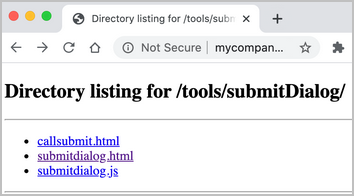
- We verify that we can see the files on the web server by using a web browser.
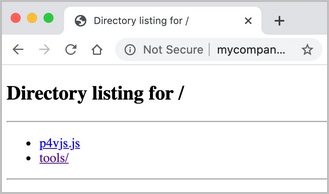
- We make sure to copy onto the web server the submitdialog.html shown in the the Url: field of Manage HTML Window dialog.
Testing the pages on the web server
-
In the Manage HTML Window dialog, we click edit on each tool, and change value in the the URL: field from a file URL to a web URL.
- When we select a tool, we can see that the URL has been changed:
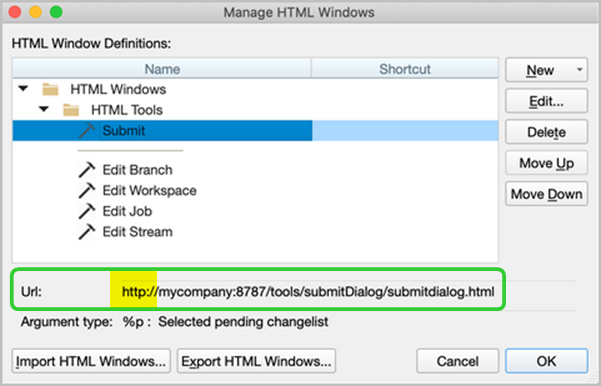
- We verify the Url: field shows an http-based URL.
-
We can now test our pages deployed onto the webserver before publishing the tools.
Copy the configuration onto the web server
- We export the configuration file for the definitions we want our end-users to be able to use. In this case, we export to the web server our custom Submit window, along with the windows for Edit Workspace, Edit Job, and Edit Stream. We keep Edit Branch on our local computer because we are still developing this window.
-
We make a copy of the exported configuration and version it. This allows us to add new tools incrementally.
- We copy the configuration file onto the web server.
-
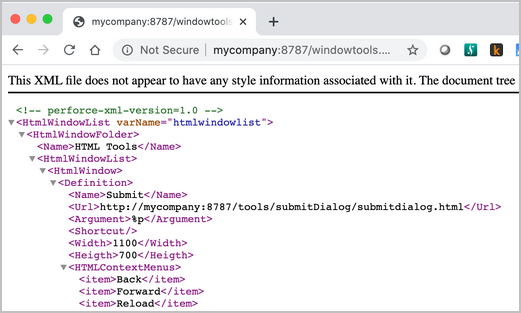
We can use a web browser to verify the URL of the configuration file.
Deploy your tools onto the web server
We deploy our HTML tool using one of the following properties.
- P4VJS.HTMLWindows for HTML Windows
- P4VJS.HTMLTabs for HTML Tabs
- P4VJS.HTMLActions for HTML Actions
In our example we set the P4VJS.HTMLWindows property at the command prompt.
p4 property -n P4VJS. -l
P4VJS.HTMLWindows = http://mycompany:8787/windowtools.xml
We restart P4V.
We open the Tools menu and see two sets of tools The first set are available to our end-users. The second set is local to our development computer.
We can delete our local HTML Windows and use the deployed ones.
P4Admin does not have the concept of deployed tabs or windows per connection. However, you can distribute your tabs and windows by exporting them from your development machine and then importing them onto your users' machines.
We can also continue developing new tools locally.
Deployed tools listed first
Any HTML Tab menus that we make available to our end-users are listed in the View menu before our local Tab menus.
Any HTML Window menus that we make available to our end-users are listed in the Tools menu before the local Window menus.
The entire deployed set is shown first, then the local set.
Folders are not shared between the two sets of tools.
Shortcuts for HTML Tools
Shortcuts for HTML Tools are a request. If another command uses the same shortcut at runtime, the shortcut request will not succeed for that particular tool.
The shortcut lookup order for P4V, tools, and HTML Tools:
- P4V commands and Custom Tools
- Locally defined HTML Tabs
- Locally defined HTML Windows
- Deployed HTML Tabs
- Deployed HTML Windows
HTML hosted by P4V pages can recognize familiar shortcuts for developers who work with the Chrome Browser. These shortcuts function if the associated context menus are enabled.
|
Windows and Linux |
Mac |
|
|---|---|---|
| Back | Alt + Left Arrow | Option + Left Arrow |
| Forward | Alt + Right Arrow | Option + Right Arrow |
| View Page Source | Ctrl + Shift + U | Command + Option + U |
| Inspector | Ctrl + Shift + C or Ctrl + Shift + I | Command + Option + C or Command + Option + I |
Local HTML Actions overwrite deployed Actions, otherwise we could not develop or improve HTML Actions after they are deployed.
P4Admin does not have the concept of deployed tabs or windows per connection. However, you can distribute by exporting them from your development machine and then importing them onto your users' machines.
Controlling access to HTML tools
The administrator controls the availability of HTML tools per connection.
The HTML tools property values are defined per connection, and different users or groups can have different properties. The deployed properties only apply to a specific connection, as defined by the port and the user.
If an end-user establishes a different connection, that user might gain access to different HTML Tools or to no HTML Tools.


