Init
This section describes how to start up a personal server using Init. Use this approach if you want to work in isolation on a personal server,
developing and possibly branching code.
To initialize a personal server and set it up with everything needed to start versioning files, do one of the following:
- Click
Initfrom the P4V toolbar -
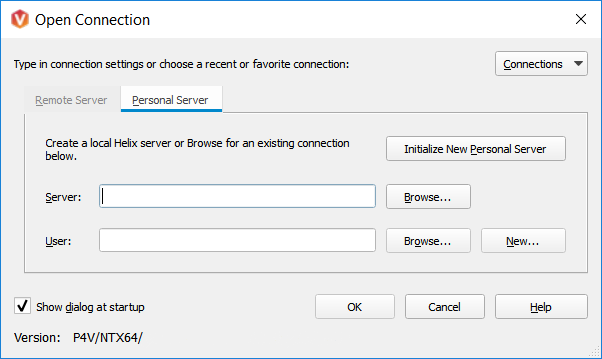
From the Open Connection dialog:
- Select the Personal Server tab
- Click Initialize New Personal Server
For command-line equivalent of Init, see Initializing a Server
Read this first
The Unicode setting and case sensitivity check boxes should match those respective settings on the shared server that will be fetched from and pushed to. If you are unsure what these settings are, the following command-line command will return the pertinent information:
p4 -ztag -p <server> info
where <server> is something like “perforce:1666”. P4V 17.1 does not support the auto-discover option for DVCS Init.
Directories and files
Init creates the following directories and files in the
directory in which the command is invoked:
.p4root- A directory containing the database files that will contain the metadata about files checked into Helix.p4ignore- A list of files Helix shouldn’t add or reconcile.p4config- A file containing configuration parameters for the client-server connection
In addition, Init does the following:
- Creates a stream depot
- Creates an initial stream called
main - Creates a workspace. Note that the client option
allwriteis set by default, making files writable without the need to check them out first
Add files
At this point, you are ready to add files to your personal server. You can create, copy, and mark for add your source files to be added to Helix and submit them. If you are new to P4V, see “Managing Files”.