Examples that run in demo mode
To enable demo mode, see HTML Tools preferences in Helix Core Visual Client (P4V) Guide.
For the example of a pre-submit and a post-submit page, which does not run in demo mode, see HTML Actions.
For a set of P4JsApi examples ported as P4VJS examples, see the P4VJS Directory. For more information, see the P4JSAPI to P4VJS Conversion Guide.
List of examples for P4V
In demo mode, P4V includes the example custom HTML Tabs and HTML Windows. The examples are written in core HTML/JavaScript and P4JsApi/P4VJS (no frameworks used).
This is not production code. The intent is to demonstrate possible use cases for the P4VJS API.
| Example type | Name | Description | Available from |
|---|---|---|---|
|
Tab |
Downloads |
Shows the Perforce Downloads page. |
View menu |
|
Blogs |
Shows the Perforce Blogs page. |
||
|
Products |
Shows the Perforce Products page. |
||
|
Demo P4V Images |
Shows how to retrieve images from P4V. It ports a P4JsApi example to P4VJS by emulating synchronous requests. See how to run Demo P4V Images. |
||
|
Demo Run Queries |
Shows how to run queries and display the result in an HTML table. This example uses built-in queries that parse the JSON result into an HTML table, but you can enter your own queries. See how to run Demo Run Queries. |
||
|
Demo Server Info |
Runs the p4 info command to show how to port a P4JsApi example to P4VJS in different files:
See how to run Demo Server Info. |
||
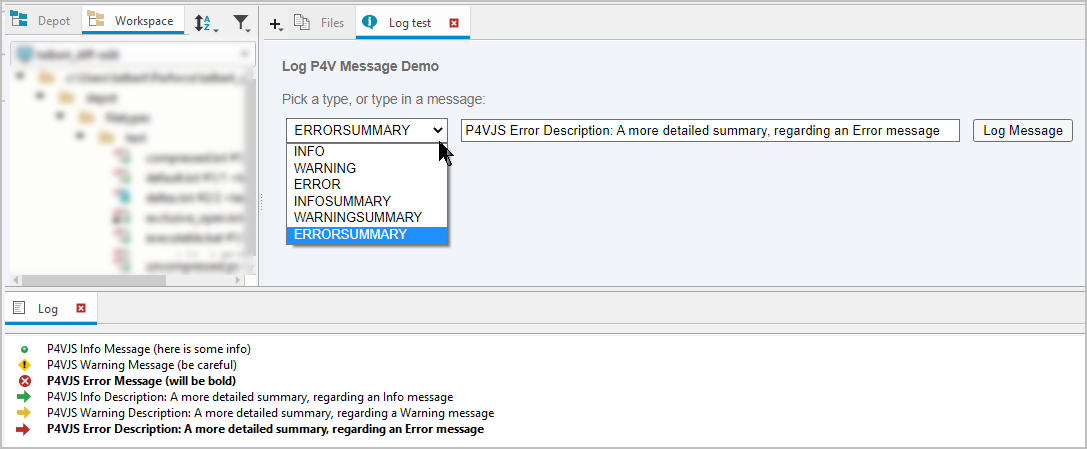
| Log test |
Allows you to write messages that can appear in the Log pane. See how to run Log test. |
||
|
Window |
Demo Connection Info |
Runs the p4 info command. See how to run Demo Connection Info. |
Tools menu |
|
Demo File Info |
Shows how to handle multi-selection and run a series of commands. See how to run Demo File Info. |
||
|
Demo Submit |
Shows the basic implementation of a Submit window. To use this demo, select a pending changelist, then choose the menu: |
||
|
Demo Edit Branch/Workspace/Job/Stream |
Demonstrates how to create and populate a dynamic form (a FormSpec). This example consists of one HTML file registered as different HTML Windows to support different selected object types. |
||
Demo Map Examples in <P4VJS Directory>/examples/mapTest |
Left Right Reverse shows how to use Include Translate shows how to use Join and Count shows how to use |
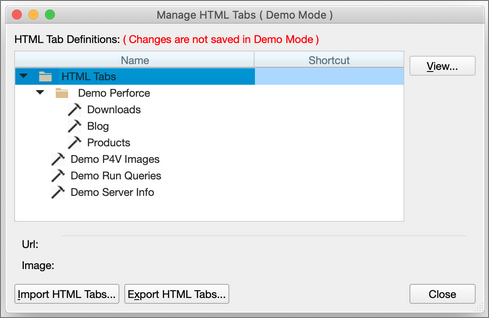
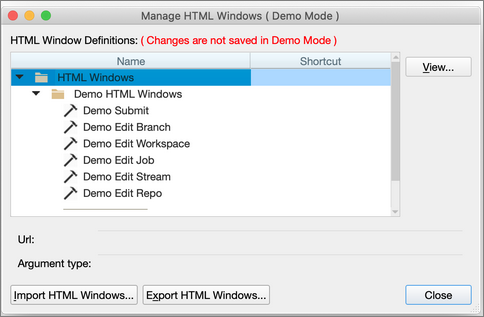
In demo mode, P4V does not save any changes you make using the Manage HTML Windows and Manage HTML Tabs editors.
Run the demo examples
When you install P4V, the example files for the P4VJS demo are included in the <P4VJS Directory>/examples/ folder. In demo mode, you have access to example HTML Tabs and HTML Windows from the View and Tools menus, and to the respective editors to manage custom HTML pages. You can activate demo mode from the Preferences window.
In demo mode, P4V does not save any changes you make using the Manage HTML Windows and Manage HTML Tabs editors.
To run P4V in demo mode:
- Go to Edit > Preferences.
-
In the Preferences window, on the HTML Tools tab, select the Run HTML Tools in demo mode check box.
P4V runs in demo mode for the duration of this session or until you clear the Run HTML Tools in demo mode check box.
Definitions of the demo tabs
To see the definitions of the demo tabs, on the Tools menu, click Manage Tools > HTML Tabs.
To see the definition of the demo window, on the Tools menu, click Manage Tools > HTML Tabs.
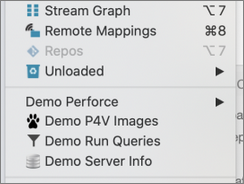
You can run the Tab demos from the View menu.
You can run the Window demos from the Tools menu.
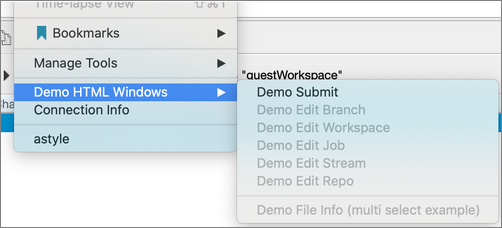
Many of the HTML windows are also added to the context menus of the appropriate objects, as specified in the Definition of the demo window.
In the Tools menu, if the P4V user selects an object that is defined by the arguments in the definition, the associated HTML Window menu item is enabled.
Tab demos
Demo Perforce : three links to Perforce pages showing that WebEngine is a full-fledged HTML renderer capable of hosting external pages and tools in P4V.
Demo P4V Images
This demo illustrates how to access some of P4V's built-in images to use in your own HTML pages.
Code snippets from <P4VJS Directory>/porting/p4vjs/imagelist.html:
var imageNames = (await p4vjs.getImageNames())["imageNames"]; // retrieves all image names
for (var i = 0; i < imageNames.length; i++) {
    var image = await p4vjs.getImage(imageNames[i]); // downloads an image
    ...
}
Demo Run Queries
In this demo:
-
Click a query or type in a query. For example,
opened -u mariato find pending changelists of the specified user in any workspace on the server, orstreams -m 100to get a list with a maximum of 100 streams. -
Click Execute.
The JSON return value appears an HTML table.
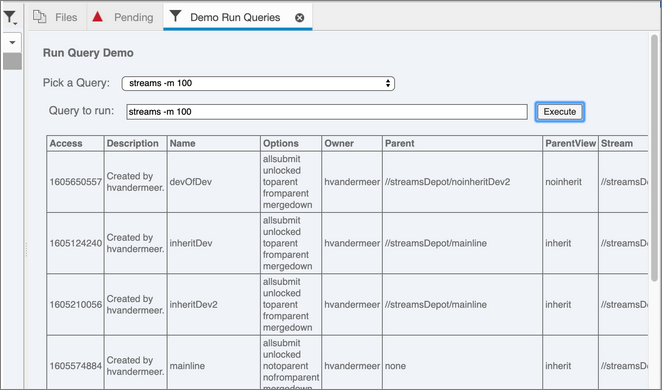
One code snippet from <P4VJS Directory>/examples/runQueries/runqueries.html:
function loadQueryResult() {
    let result = await p4vjs.p4(p4query);
    var queryResultContainer = result.data;
    ...
Demo Server Info
This demo runs the p4 info command.
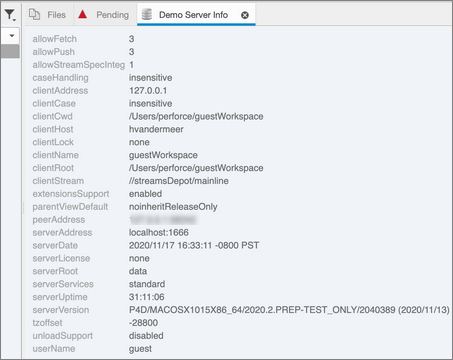
One code snippet from <P4VJS Directory>/porting/p4vjs/serverinfo2.html:
p4vjs.p4('info').then(function(serverInfo) {console.log("p4 info called", serverInfo);
Log test
On the View menu, click Log test.
Add and customize the messages you want.
Window demos
Demo Connection Info
<P4V installation directory>/Contents/Resources/p4vjs/porting/p4vjs/displayinfo2.html demonstrates how to read configuration values from p4vjs:
textNode = document.createTextNode(await p4vjs.getApiVersion());textNode = document.createTextNode(await p4vjs.getCharset());textNode = document.createTextNode(await p4vjs.getClient());textNode = document.createTextNode(await p4vjs.getPort());textNode = document.createTextNode(await p4vjs.getUser());textNode = document.createTextNode(await p4vjs.getServerRootDirectory());textNode = document.createTextNode(await p4vjs.getServerVersion());textNode = document.createTextNode((await p4vjs.isServerUnicode()=="true" ? 'Yes' : 'No'));textNode = document.createTextNode((await p4vjs.isServerCaseSensitive()=="true" ? 'Yes' : 'No'));
Demo File Info
<P4VJS Directory>/examples/fileInfo/fileinfo.html illustrates how to handle a selection of multiple files.
The multiple selection is used to compose a query, and execute the query.
p4query = ["fstat", "-Orlf "].concat(p4vjs.selectedFiles());
var result = await p4vjs.p4(p4query);
var queryResultContainer = result.data;


