Team management
A project's team members can include users, groups, collaborators, and bots. Projects are private by default. This means that you have to explicitly grant access to a project. You can mark a project as public (open to everyone in the company) when you create it or by editing its settings later on. To access the project settings, click Settings in the right-side menu in the Activity view.
In Helix TeamHub, each repository always belongs to a single project. In addition to project roles, it is possible to configure member permissions per repository. Project-level permissions are often sufficient for companies with few users and repositories, while repository-level roles allow more fine-grained access control over specific repositories.
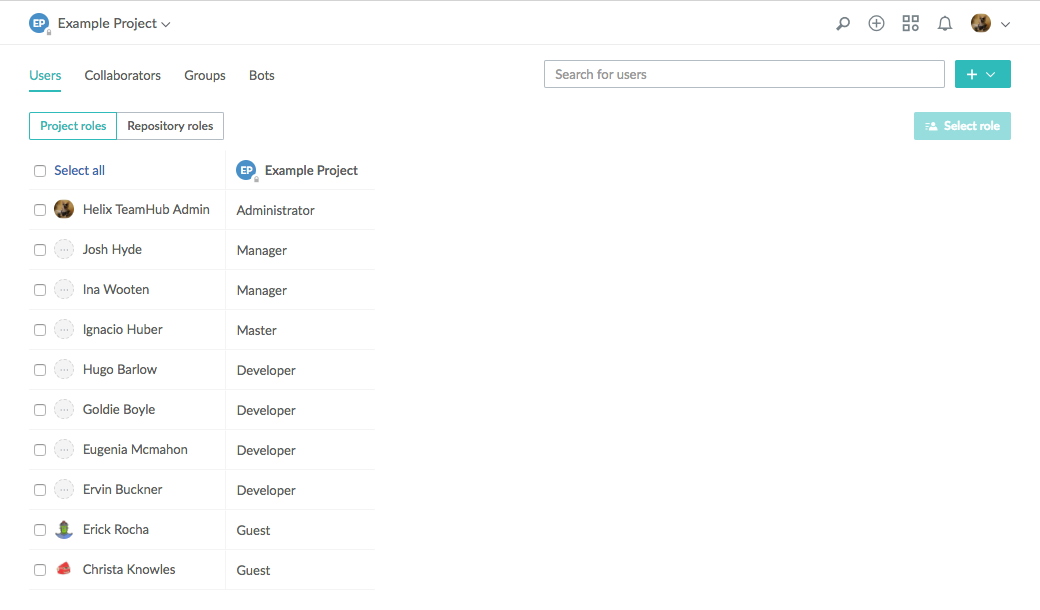
You manage project- and repository-level permissions in the Team view. This view is divided into the following tabs: Users, Collaborators, Groups, and Bots. Each tab in turn includes the sub-tabs Project roles and Repository roles for the different level of permissions configured.
Project Level Permissions
You manage project-level permissions on the Project roles tab. Do the following:
-
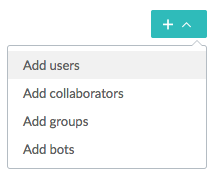
Click the drop-down list on the right to add project users.

-
In the Add project users form, select new team members and then specify the role that you would like to assign to them. For more information about the available roles, see Project & Repository Roles.


Repository Level Permissions
When enabling repository authorization, keep in mind that by default, TeamHub only grants the current project administrators access to the repository. Likewise, disabling repository authorization downgrades all given roles to match the current project roles.
Stream repositories are only used by Helix DAM and do not support repository-level permissions.
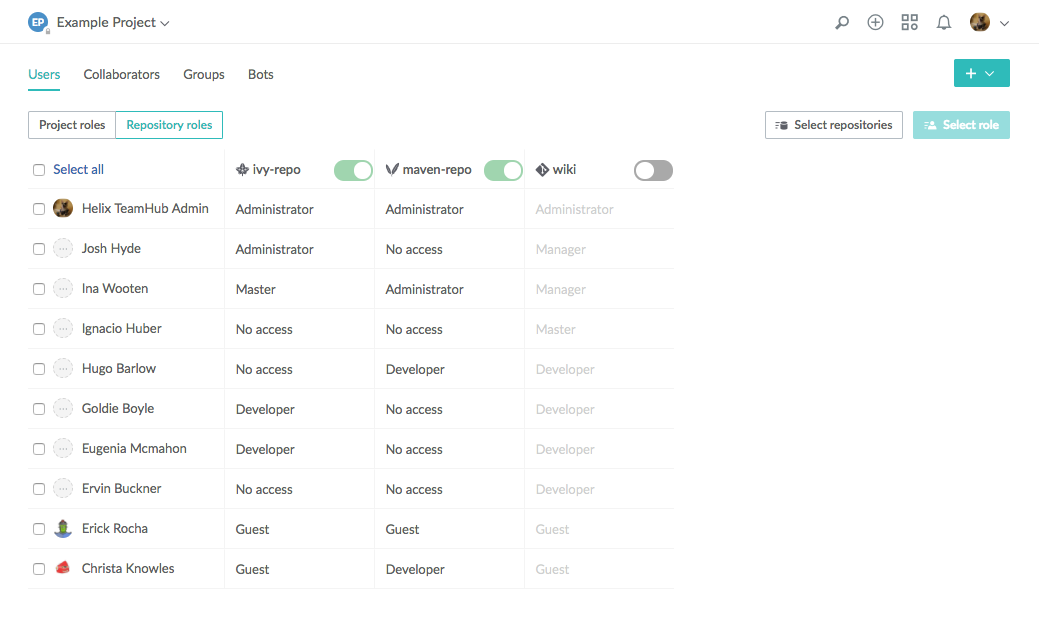
You manage repository-level permissions on the Repository roles tab. The team members listed on this tab always match those listed on the Project roles tab. For each repository, you need to explicitly turn on repository-level authorization.
To turn on repository-level permissions, click the button next to a repository name to turn on authorization.
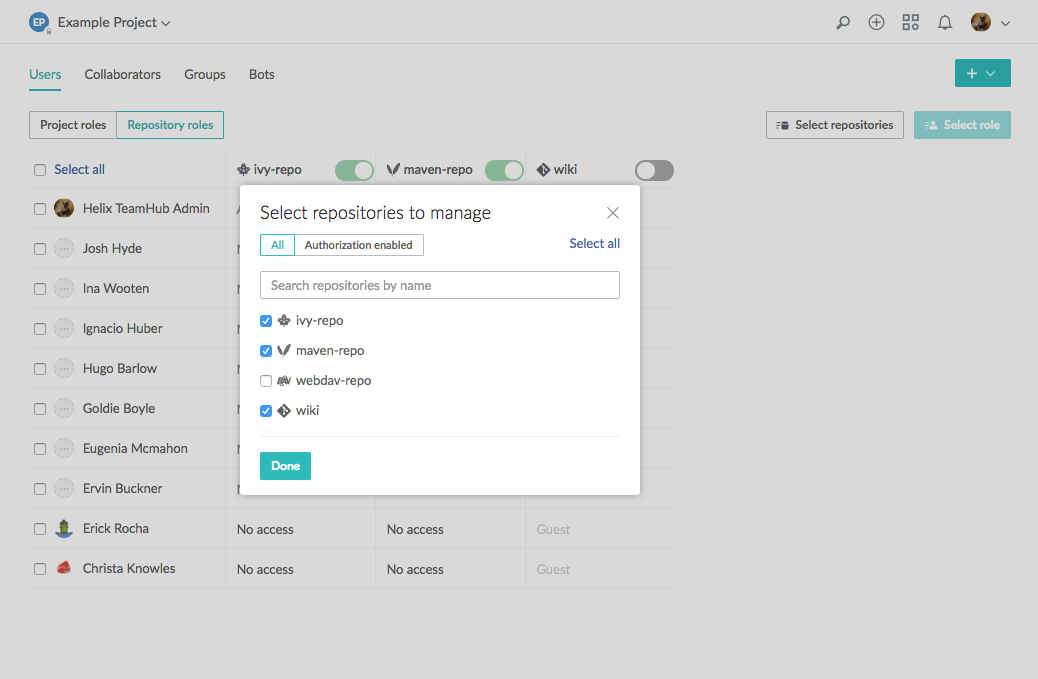
To specify the repositories to manage, click Select repositories. In the Select repositories to manage form, select (or clear) the check boxes of the required repositories and click Done.
For more information on how repository-level permissions affect access rights, see Project & Repository Roles.
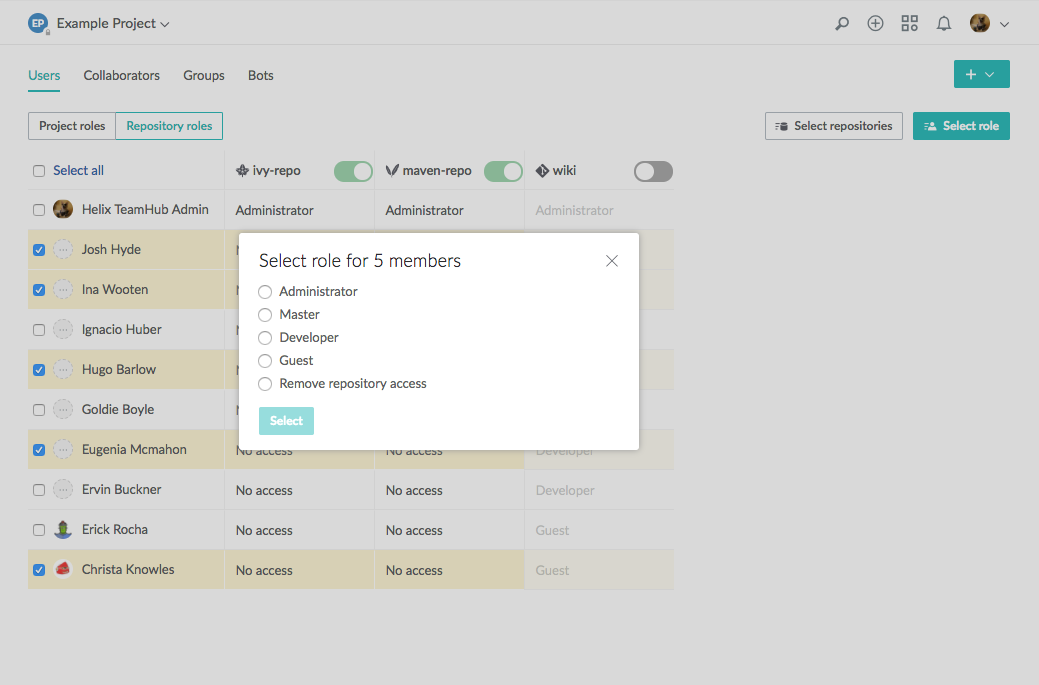
Role selection and batch actions
When permissions are turned on for a repository, you can assign a role to each member of the team.
To assign a role:
-
Select one or more members and click Select role.

-
In the Select role form, select the required role or select Remove repository access if you want to remove the selected member or members from the project or revoke a member's access to the repository.
-
Click Select.