Manage depots
If you have super user permission for the
Helix Server
instance to which you are connected, you can manage the depots that it
contains. Specifically, you can:
For detailed steps, see the individual sections.
Create a depot
- Select File > New > Depot.
- In the New Depot dialog, enter a name for the depot and click OK.
-
In the Depot window, provide the following information:
- Owner: The user who owns the depot. By default, this is the user who created the depot.
- Description: A short description of the depot's purpose. Optional.
-
Depot type: Can be any of the following:
- local: Writable. Files reside in the server's root directory and are managed directly by the server. By default, there is one local depot named
depoton every Helix Server installation. -
stream: (Default) Writable. Contains stream
 A branch with built-in rules that determine which changes to propagate to files in a stream depot, and in what order. A stream specification defines a stream. A user creates a stream spec by using the 'p4 stream' command or in P4V with File > New Stream. In P4V, stream specs are visible in the Streams Graph and the Streams tab.s, a type of branch that includes hierarchy and policy.
If you select this depot type, you can also modify the stream depth, which is the optional depth to be used for stream paths in the depot. The depth specifies the number of slashes following the depot name of a stream. By default, the stream depth is
1, matching the traditional stream name. You cannot update this value once streams or archive data exist in a depot. When you use P4Admin to create a depot of type stream, the maximum depth of the stream is10.NoteThe P4Admin Depots tab shows the streams depot named
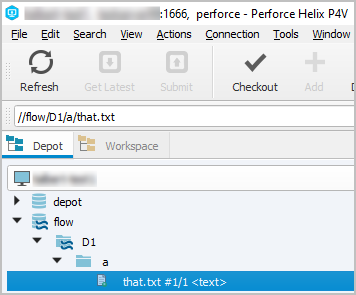
flow. This depot contains a folder namedD1.The P4V Depot tab shows a streams badge for both the
flowdepot and the//flow/D1stream it contains. To work with a stream, use the P4V Streams Graph and Streams tab.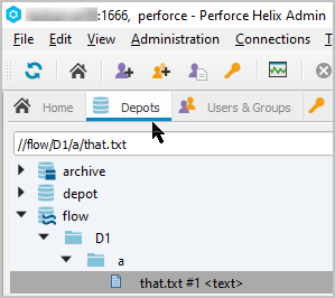
-
spec: Automatically archives edited forms. For more information, see Working with spec depots in the Helix Core Command-Line (P4) Reference.
If you select this depot type, you can also:
- Add specification mapping, which is an optional description of which specs should be saved, expressed as a view.
- Specify a file extension, which is appended to versioned specifications.
-
remote: References files that reside on other server and cannot be written to. For more information, see Working with remote depots in the Helix Core Command-Line (P4) Reference.
If you select this depot type, you can also specify the mapped portion of the remote server. By default, this is //.... The map points to a location in the remote depot's physical namespace, for example //depot/new/rel2/.... This directory will be the root of the local representation of the remote depot.
- archive: Used in conjunction with archiving (p4 archive) and restoring (p4 restore) to facilitate offline or nearline storage of infrequently accessed revisions, typically large binaries.
- unload: Holds infrequently used metadata (about old client workspaces and labels) that has been unloaded (with the p4 unload command). For more information, see the Helix Core Server Administrator Guide.
- graph: For storing repos A graph depot contains one or more repos, and each repo contains files that the Git Connector caches or mirrors from Git users. in one or more graph depots A depot of type graph that is used to store Git repos managed by Helix Core Server. See also Git Connector and classic depot..
- local: Writable. Files reside in the server's root directory and are managed directly by the server. By default, there is one local depot named
- Storage of location for versioned files: By default, the storage location is relative to the server root, but you can use an absolute path to stare files in a location that is not located under the server root.
- Click Apply to save your changes and keep the window open or Ok to save your changes and close the window.
Display or edit depot details
-
Select View > Depots. The Depots tab opens in the right pane.
The left side of the tab shows the depot tree. The right side shows the files that are located in the folder you have selected in the depot tree. The two sub-tabs at the bottom provide additional information:
- If and by who a selected file is checked out
- A preview of the file
-
To view additional information on a depot, in the Depot tab, right-click the depot and select View Depot '<depot-name>'.
The Depot window opens, displaying information such as the depot name, date last modified, owner, description, type, and storage location for versioned files.
-
Optionally, click:
-
Edit to modify the Owner, Description, or Storage location for versioned files fields.
All other fields are read-only for existing depots.
When done with your edits, click Apply to save your changes and keep the window open or OK to save your changes and close the window.
-
Print to send the information to a printer of your choice. In the Print dialog, select the printer and click Print.
-
- Click Close.
Delete a depot
- In the Depot tab, right-click the depot you want to delete and select Delete Depot '<depot-name>'.
- When prompted for confirmation, click Yes.
Obliterate files from a depot
Obliterate with extreme caution. Obliteration permanently removes all traces of the specified files from the Helix Server, including revision records and metadata (such as references in labels and client workspace specifications). Files in client workspaces are left untouched, but they are no longer recognized as being under Helix Server control.
- In the Depot tab, right-click a file and select Obliterate.
- In the Obliterate dialog that opens, click Add to browse to the file or files you want to delete.
- Select whether you want to obliterate all revisions, all revisions up to a specific revision, or all revisions between two specific revisions.
-
Optionally, click Preview to see the effects of obliterating the selected files. For example:
//flow/D1/a/that.txt#1
//flow/D1/a/this.txt#1

Would delete the following:
* 2 record(s) from the revision database (0 archive record(s) purged)
* 4 record(s) from the have database
* 0 record(s) from the opened files database
* 12 record(s) from the integration database
* 0 record(s) from the label database - Click Obliterate to confirm.


