System Information
The system information page is available to users with admin or super privileges.
The system information page provides details that can be useful to Perforce support engineers when you ask for assistance.
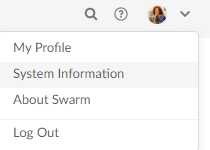
To display the system information page, click System Information from the User id dropdown menu:
In this section:
- Perforce tab
- Log tab
- PHP Info tab
- Queue Info tab
- Cache Info tab
Perforce
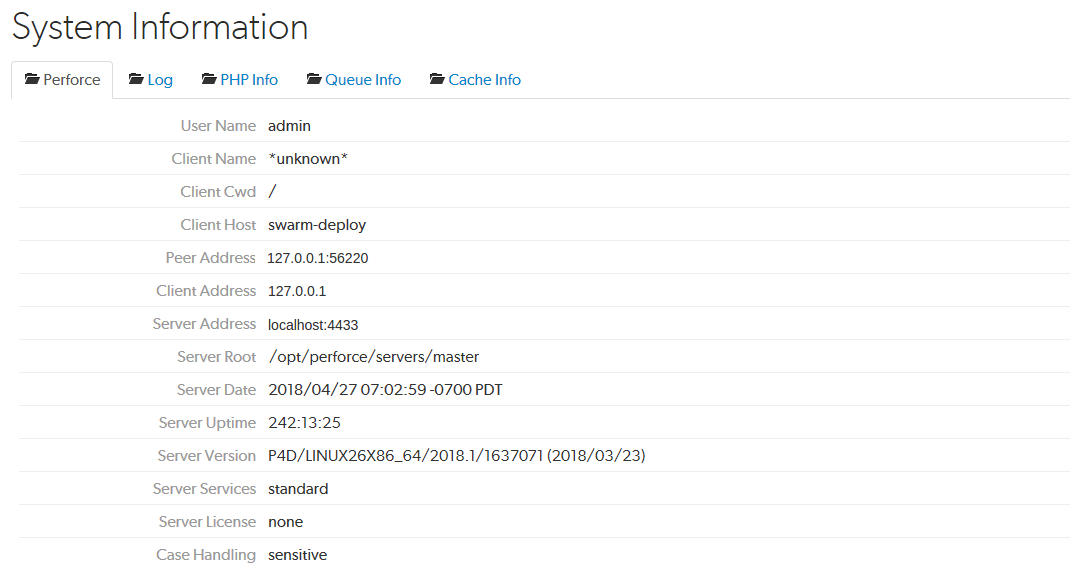
The Perforce tab provides information similar to the p4 info command.
Log
Click the Log tab to display the most recent entries, up to 1 megabyte, in Swarm's log file, which resides in SWARM_ROOT/data/log. Review the logging levels for Swarm logs to ensure that the entries you want to see are included.
If your log entries include a critical error, an arrow is displayed on the left of the log entry. Click the error to display the stack trace that accompanies the error.
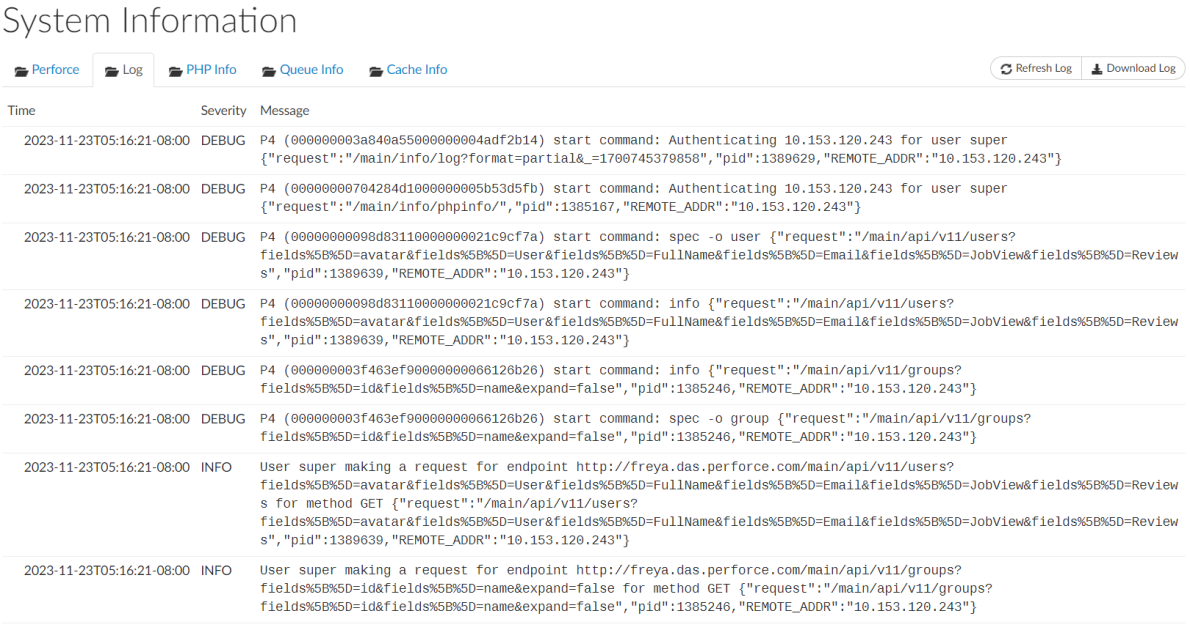
Log tab buttons:
- Refresh Log button: click to load the latest log entries, up to 1 megabyte.
- Download Log button: click to download the log and all of its log entries.
PHP Info
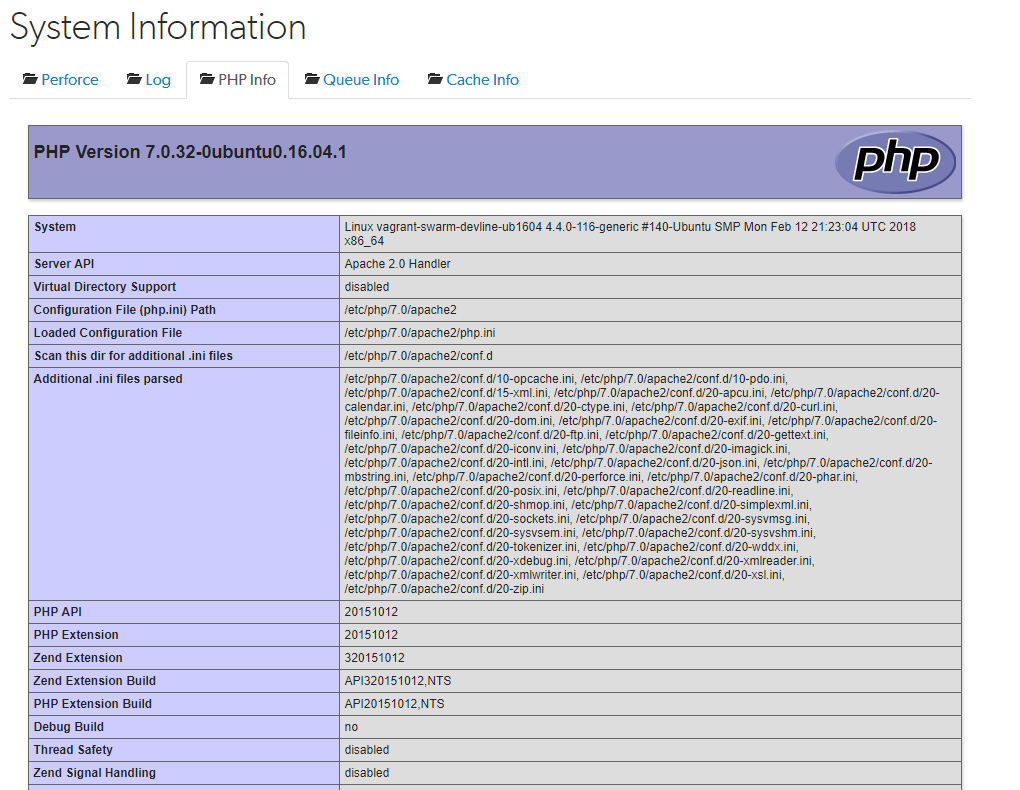
Click the PHP Info tab to display PHP's own information display generated by executing phpinfo(), PHP's internal diagnostic display.
Queue Info
Click the Queue Info tab to display the Swarm task queue information.
Workers should be started automatically using a recurring task. For instructions on how to set up a recurring task to spawn workers automatically, see Set up a recurring task to spawn workers.
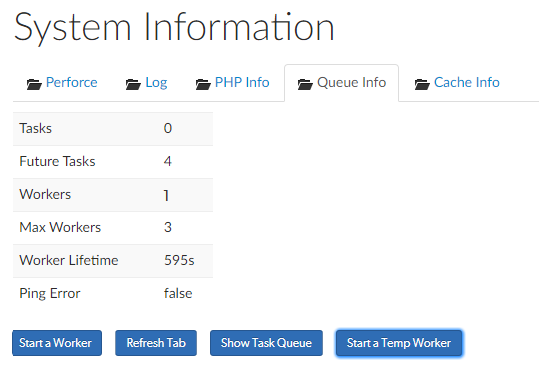
- Tasks: displays the number of tasks in the queue.
- Future Tasks: displays the number of future tasks in the queue. There are usually at least four future tasks in the queue for checking cache integrity, but there can be more. For example, when a user is making comments, the comment notification is delayed by 30 minutes by default. This is a future task.
- Workers: displays the number of workers available to service tasks.
- Your workers are not being created automatically. For instructions on how to set up a recurring task to spawn workers automatically, see Set up a recurring task to spawn workers.
- To process the current task queue while you get your recurring tasks working again, click Start a Temp Worker. This is a quick way to get Swarm running again while you fix the problem.
- Max Workers: displays the maximum number of workers that are allowed. The default is three.
- Worker Lifetime: displays the worker lifetime that is configured. The default is 595 seconds (10 minutes less 5 seconds).
- Ping Error: not used.
If the number of Workers is 0 (zero):
Queue Info buttons:
- Start a Worker button, only available if Workers is less than the Max Workers setting: click to manually start a new Swarm worker. The new worker will only last for the configured Worker Lifetime. If the number of workers running matches the configured limit, the new worker is not started.
- Refresh Tab button: click to refresh the queue information in the tab.
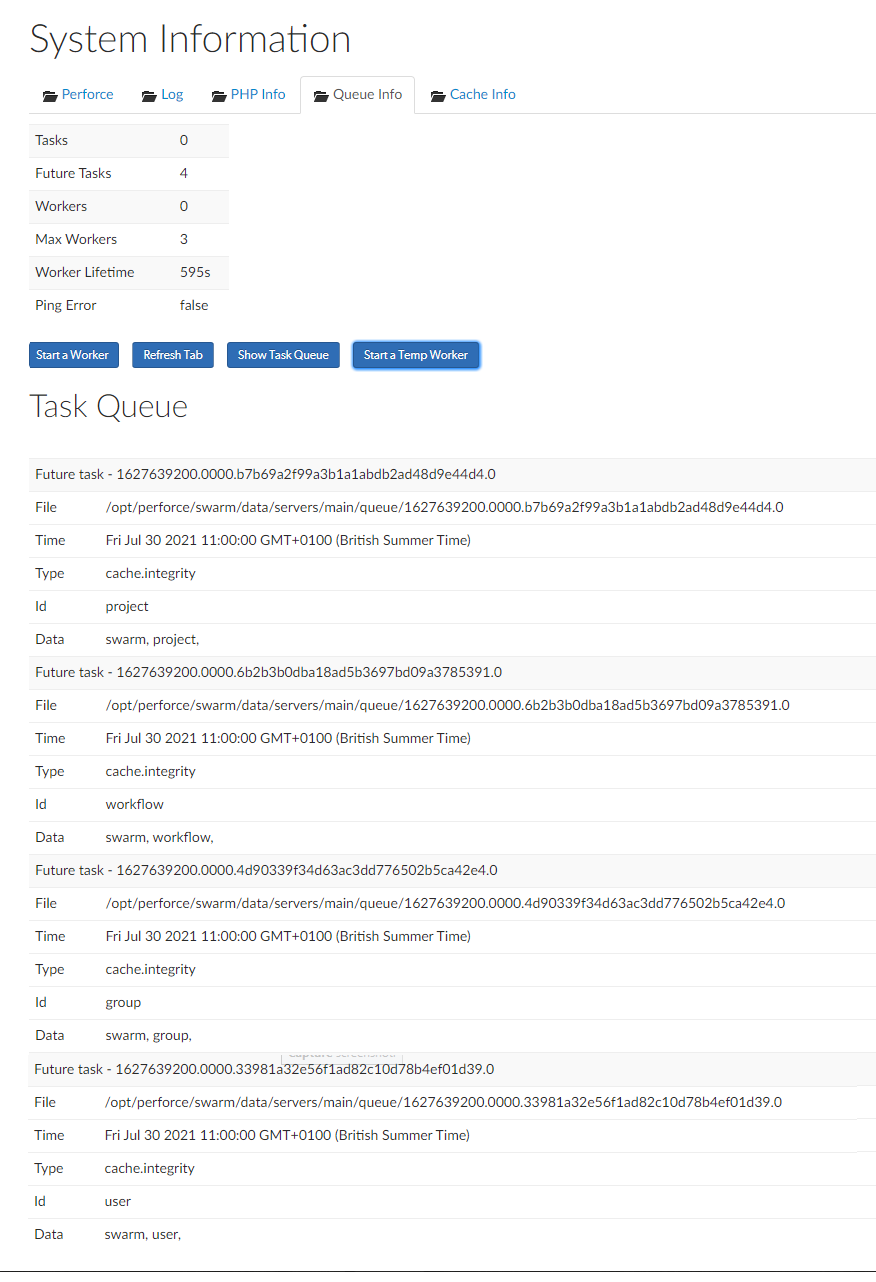
- Show Task Queue button: click to display the Task Queue information. When the task queue is displayed the button changes to Hide Task Queue. The task queue shows more information about the tasks and future tasks in the queue.
- Start a Temp Worker button, only available if Workers is less than the Max Workers setting: click to manually start a Swarm temporary worker. Typically you use a temporary worker to process the current tasks in the queue while you fix the recurring task that automatically spawns the workers.
If your recurring task has stopped working and you need to process the task queue while you get it working again, start a temporary worker by clicking Start a Temp Worker. This is a quick way to get Swarm running again while you fix the problem.
This is a special Swarm worker that is not subject to the worker lifetime setting and will not stop until it has processed all of the tasks in the current queue or one of the tasks fails.
Task Queue
Click the Show Task Queue button to display the tasks in the Swarm queue.
Cache Info
Click the Cache Info tab to display the Swarm cache information.
By default, Swarm runs a regular verification check at 03:00 every day to make sure that the Redis caches and Helix Core Server are in sync, see Swarm connection to Redis .
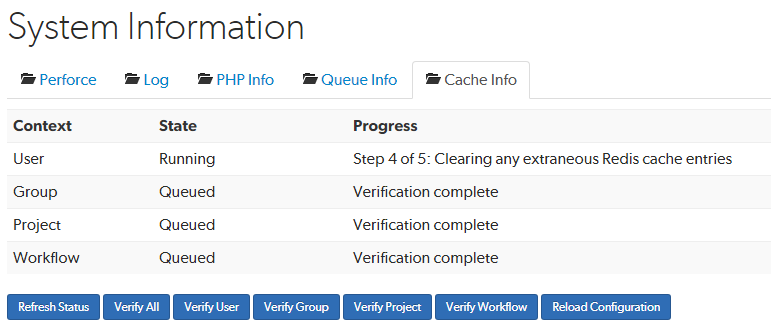
The Cache Info tab displays the cache verification state and progress for each of the Redis caches:
- Valid states for verify are; Not Queued, Queued, Running, and Failed.
- Valid states for progress are, Step x of y; (where x is the current step and y is the total number of steps) followed by:
- Getting Redis cache entries
- Calculating checksums for Redis keys
- Calculating checksums for Perforce models
- Clearing any extraneous Redis cache entries
- Indexing any missing Perforce models into the Redis cache
- Verification complete
Refresh Status button
To refresh the cache information on the tab, click Refresh Status.
Verify buttons
On Swarm systems with a large number of users, groups, and projects verification of the caches can take some time and can impact performance.
In normal operation, the Redis cache and Helix Core Server data should stay in sync and there is no need to verify the caches.
If you have a large number of users, groups, and projects, we recommend that you verify the individual user and group caches rather than using Verify All.
In normal operation the Redis cache and Helix Core Server data should stay in sync and there is no need to verify the caches. However, in some circumstances, such as when changes are made in the Helix Core Server when Swarm is down or if errors occur during updates, the Redis cache can get out of sync with the Helix Core Server.
If you suspect that you have a cache issue, the verify buttons enable you to manually verify the caches. Before using the Verify All button, see the Important note above. If verification finds the cache is out of sync with the Helix Core Server, Swarm automatically updates the data in that cache.
For example, to verify the User cache:
- Navigate to the Cache Info tab on the Swarm System Information page.
- Click Verify User.
Swarm responds with a message to say that it has successfully verified the user cache.
Reload Configuration button
The Swarm configuration is stored in the SWARM_ROOT/data/config.php file. If you make a configuration change, Swarm will not use it until the configuration cache has been deleted and reloaded, this forces Swarm to use the new configuration.
To delete and reload the Swarm configuration cache:
- Navigate to the Cache Info tab on the Swarm System Information page.
- Click Reload Configuration.
Swarm responds with a message to say that it has successfully reloaded the config.
Swarm is now using the updated Swarm config.php file.


