Configuring builds with Jenkins
The feature branch workflow requires a successful (green) build from Jenkins before you can merge the feature branch into the target branch in Helix TeamHub.
Initial setup
Perform the following steps for the initial setup:
- Set up a TeamHub project and create a new Git or Mercurial repository. You also need to have some feature branches to the Git/Mercurial repository.
- For Jenkins to execute the build, set up a Jenkins job to be triggered for the feature branches in this repository.
- For Jenkins to notify TeamHub of whether the build succeeded or failed, do the following:
- Set up a TeamHub bot account for programmatic access.
- Set up a TeamHub Jenkins hook for triggering the Jenkins build.
- Configure the Jenkins job to build feature branches.
- Install and configure the Jenkins Helix TeamHub plugin.
Set up a bot account for programmatic access
Helix TeamHub has a unique concept called bot accounts, or simply bots. Bots are used for external access to Helix TeamHub APIs and version control systems. Configuring a continuous integration server is an ideal example of using bots instead of your personal credentials.
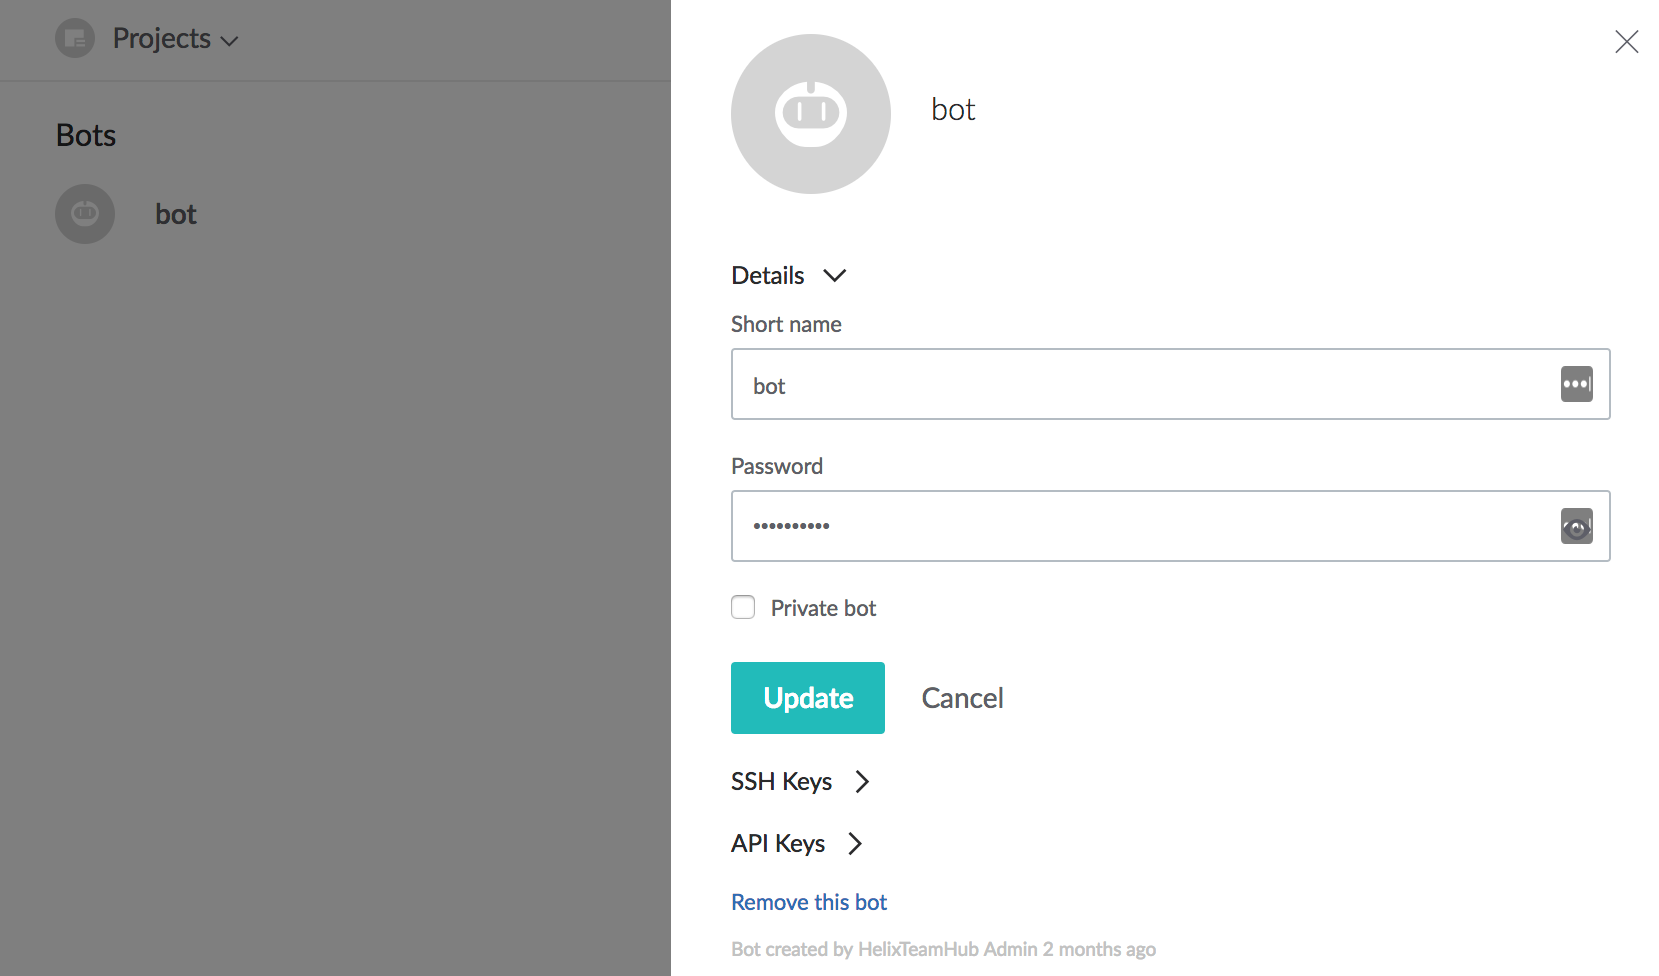
Setting up a bot account in TeamHub is done through the bots UI. All users with access to TeamHub can create bots. When you create a bot, you become the owner of the bot, but you can share ownership of bot accounts between multiple users. As the following figure shows, you do not need to assign others as owners or members of the bot, but simply add the bot to the project.

To add a bot to a given project, you use the project's Team view. For this purpose, you need to assign a guest role to the bot because it only requires read access to the code. Bots with guest access can publish build events. For a complete description of bot credentials, see Bots & programmatic repository access in the Helix TeamHub User Guide.

Set up a Jenkins hook for triggering builds
Next, you need to set up a Jenkins hook for triggering a build for each change in the feature branches. You manage hooks in the project's Hooks view. TeamHub supports over 80 hooks to different services. After you add the Jenkins hook to a Git repository, a commit hook posts a request to http://yourserver/git/notifyCommit after each change, in correspondence with Jenkins Git Plugin documentation.

Configuring the Jenkins job
When setup on the TeamHub side is complete, you are ready to create a new job in Jenkins and configure necessary job-related settings. Perform the following steps:
-
Add the clone URL for the repository to the job configuration. TeamHub supports both SSH and HTTPS protocols for repository access. While SSH is typically preferred over HTTPS, in this example, you use HTTPS for simplicity.
-
Configure
branches to buildtorefs/heads/features/**. This makes Jenkins run the job only upon changes to branches that are prefixed with features/, such as features/login, features/logging, features/foo, and so on.
-
Add your bot credentials to the configuration. In TeamHub, you can find them in the project's Team tab or in the company's Bots tab by clicking the cogwheel icon that appears when you hover over the bot name.

-
Enable the
Poll SCMoption in the Job configuration for the TeamHub Jenkins hook to start the execution of this job. However, you do not need to specify a polling schedule. Jenkins relies on this setting to determine which builds to start when changes occur.

Setting up the build steps is not covered here because those steps are project specific. For more information on configuring the build and test automation, refer to the documentation for the application in question.
Configure the TeamHub Jenkins plugin
You install the TeamHub Jenkins plugin from the Jenkins plugin manager. Make sure to configure it according to the plugin instructions. When you are done installing and configuring the plugin, a new post build action should be available in the Jenkins job configuration named Helix TeamHub notification.
For Jenkins to send build information successfully, you need to add the Helix TeamHub notification post build action and configure the account key of the bot account to it. This way, the plugin utilizes the correct credentials when creating the event. After setting the post build action and saving the Jenkins job settings, you are all set for proper testing.
To configure the plugin:
-
To allow Jenkins to send notifications to TeamHub, configure the API keys for your Jenkins instance (Helix TeamHub Company Key and Helix TeamHub API hostname), as follows.
-
Look up the company key in TeamHub, as follows:
Click the user list at the top right and select User preferences. Then click API keys.
- In Jenkins, select Manage Jenkins > Configure System to open the Jenkins System Configuration.
-
Find the Helix TeamHub notifier section and provide the following:
- Helix TeamHub Company Key field: The company key retrieved in step a
- Helix TeamHub API hostname field: The hostname of your TeamHub instance

-
-
Specif which Helix TeamHub account each job should utilize, as follows:
- In Jenkins, select Job > Configure.
-
In the Job Configuration, add a new Helix TeamHub Notification Post-build Action by providing the account key of the TeamHub account you want the job to utilize. This account is usually the bot account you created in Set up a bot account for programmatic access.
To look up the bot account key, in TeamHub, in the Bots view, move the pointer over the bot you created for this purpose and click the gear icon
 that appears. In the details panel on the right, expand the API Keys section to view the Account Key.


Testing the setup
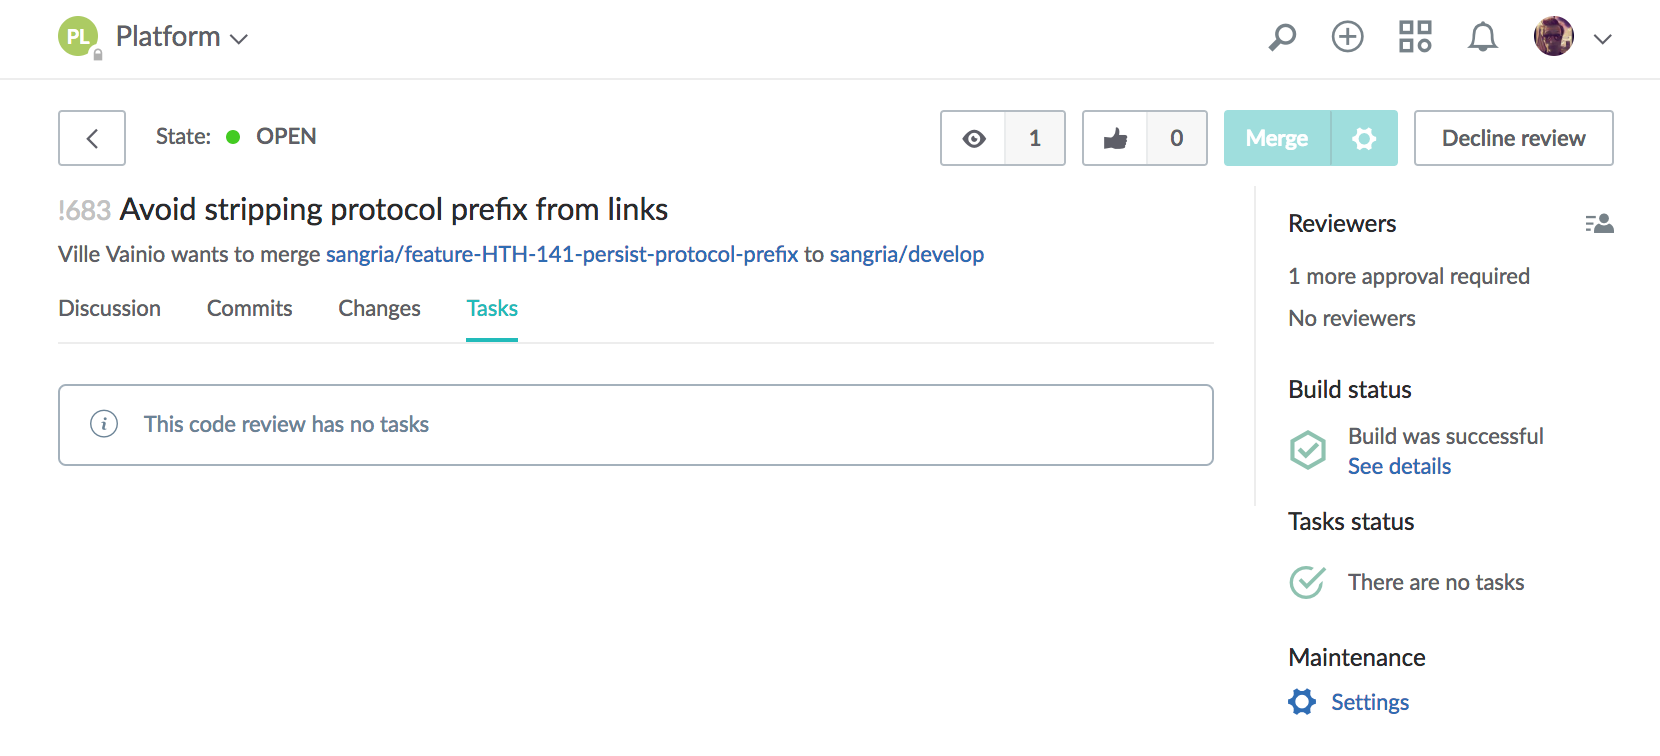
You can now test the setup by creating a feature branch named features/new-feature. Create a couple of commits to the branch and push it to Helix TeamHub. Once the branch is pushed, you can create a new code review with the branch against the main branch and select the Require passing build check box.
Selecting the Require passing build check box disables merging the changes through the TeamHub web interface until TeamHub receives a successful build notification for the given branch. However, you can still merge changes manually through the command-line, which is sometimes useful.

When you click the Create button in the New code review form to start the code review, you should see that the Build event is already green and that merging changes is possible. However, automated builds and verifications might take longer, and the successful or unsuccessful status only shows after the build is executed.