Explore P4 DAM in 7 Steps: Article Guide
Perforce P4 Digital Asset Management (DAM), formerly Helix DAM, makes storing, editing, and reviewing your creative assets easy and efficient. Built with complex industries like game development, virtual production, and media in mind, P4 DAM supports many types of files and ambitious projects of any scale.
This digital asset management tool is a secure and interactive repository for all art assets – including 2D, audio, video, and 3D files. Your vision can come to life in one place, with the help of everyone on your team.
This guide walks you through some of the core functionalities and features in P4 DAM. You can also watch the video tutorial from solutions engineer Ryan Maffesoli.
1. Log in and browse the dashboard.
The first view you will see when you log into P4 DAM is the login screen. If you don’t yet have login credentials, reach out to your admin.
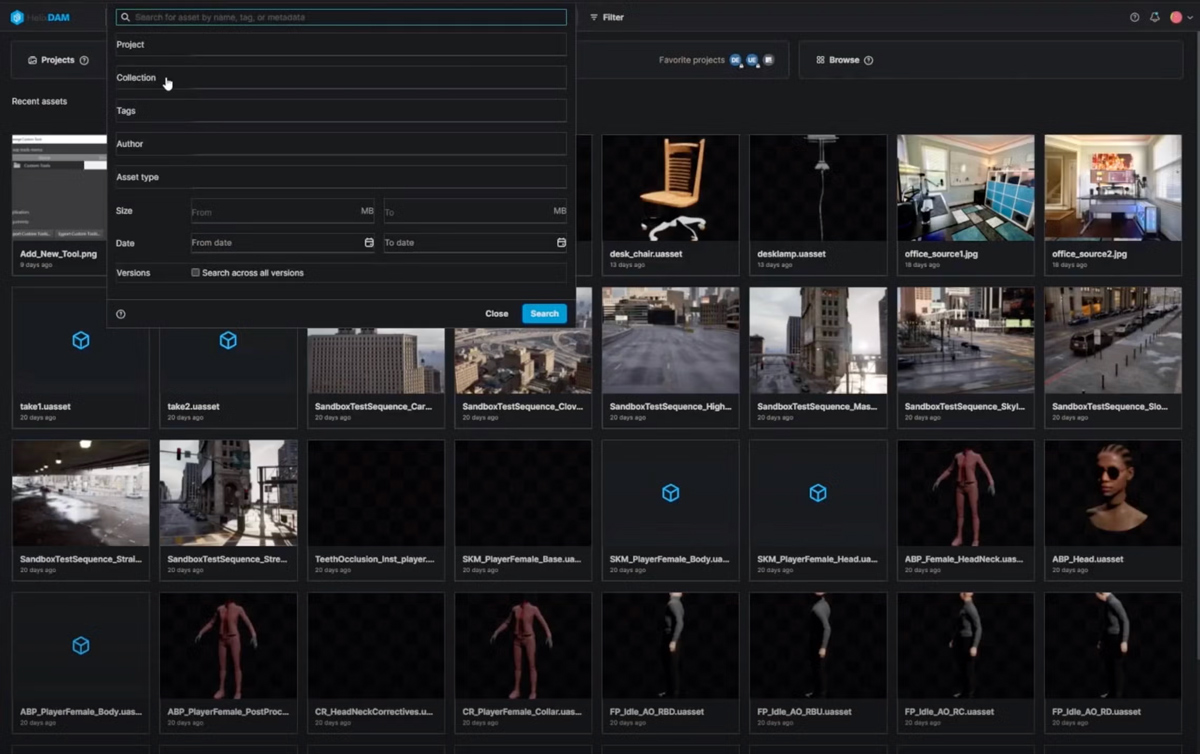
When you log in, your experience begins on the home page. This displays the search results of our most recent assets. From this page, you can navigate to your different projects, collections, and assets.
For background, here’s an overview of these core terms and the structure P4 DAM uses to organize and protect your assets:
- Projects are the highest level of categorization. They contain collections, folders, and assets. We recommend giving your projects a global and recognizable name across your teams (such as the name of the game or film you are creating).
- Collections are categorized under projects. They can represent different departments or stages within a project (like previsualization, final editing, and everything in between).
- Folders can be created within a collection. They further classify assets, grouping them by their type or purpose (like materials and textures, videos, and audio files).
Whether or not you will use all these levels of categorization depends on the scope of your project. While some people use all three, other P4 DAM users find they only need to organize their work within projects and folders.

2. Discover search and filter capabilities.
Use the search bar at the top of the dashboard to find specific assets and select optional filters to narrow these results. For example, you could filter by JPG assets, FBX assets, or other file types.
From this search result page, you can click on individual assets. This view will give you key information: See asset tags, past asset revisions, comments, the project the asset falls under, and the asset’s status within your workflow.

3. Walk through a sample project.
Access projects by clicking on the Projects button on the top lefthand side of the dashboard. From here, you can select My Projects to see projects where you have been invited as a team member, or All Projects to see all projects you have access to within the depot.
To experiment with creating a new project, click the New Project icon in the top righthand corner of this page. From there, you can upload assets, invite others to collaborate, and more.
To add assets to a project, you can drag and drop a file or a batch of files into an existing collection or folder.
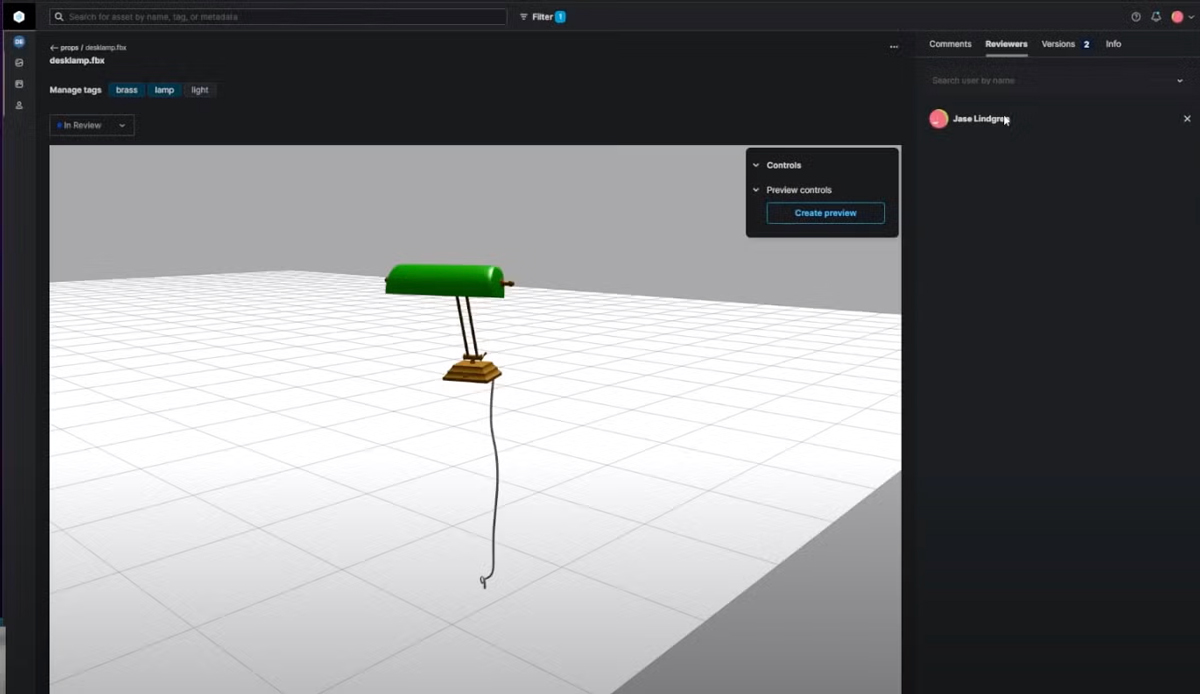
4. Understand the review process.
If you click on the drop-down status bar above the asset, you can change an asset’s status from Open to In Review. This will bring up a Reviewers tab.
Anyone who is already associated as an automatic reviewer for that asset will receive an email notification. You can also add specific users, allowing them to see the asset, leave their comments, and continue the workflow.
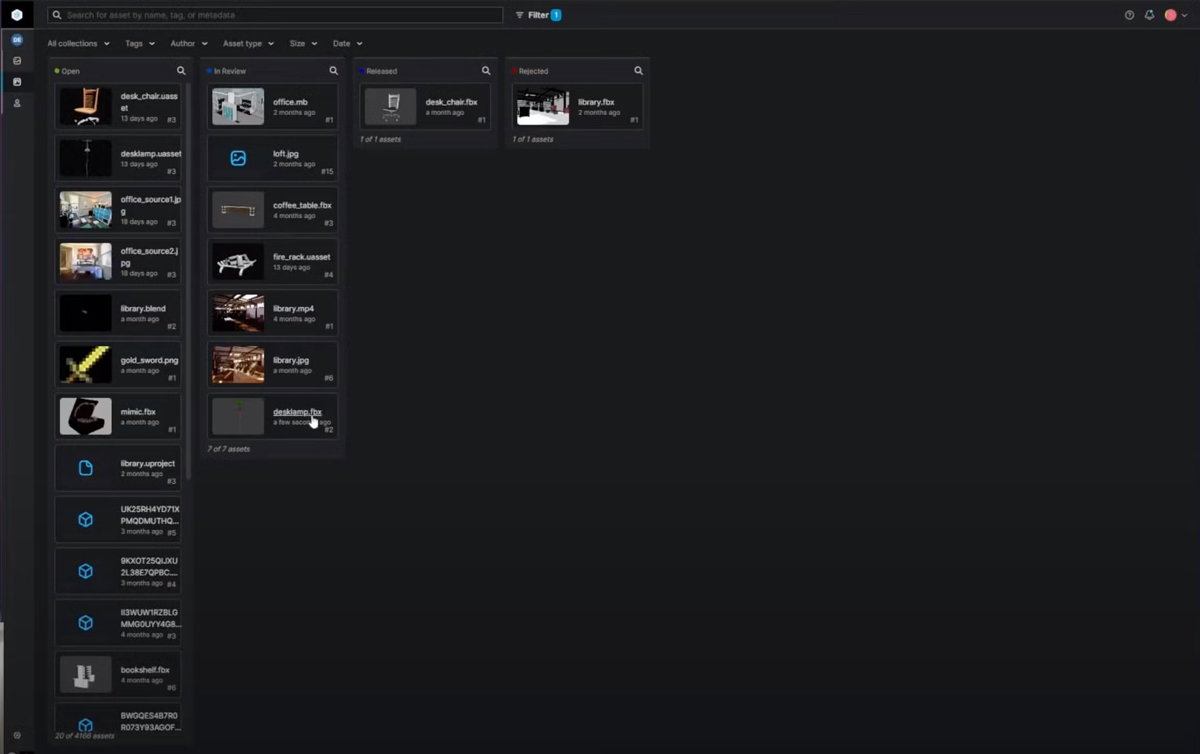
5. Track projects + visualize workflows with the Kanban board.
P4 DAM’s Kanban board is a way to instantly visualize where assets currently sit in your workflow, as well as move them along in this process. It’s a helpful resource for status meetings and team standups.
To see and interact with the Kanban board, click on the Kanban board icon. From there, you can see if assets are Open, In Review, Released, or Rejected. Admin team members can also drag and drop assets into different columns.
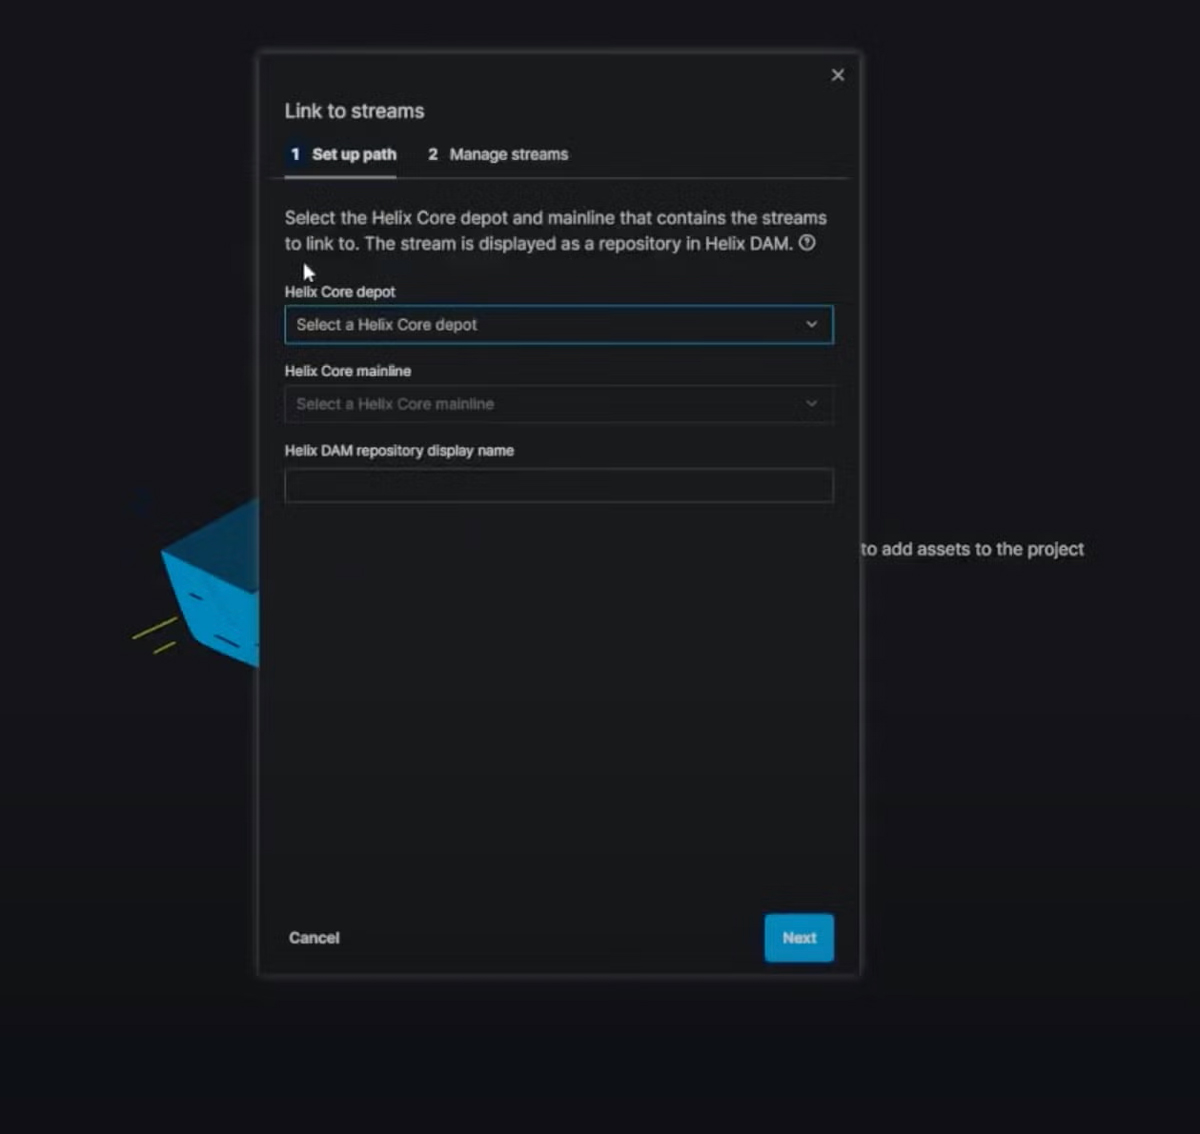
6. Connect P4 DAM projects to existing P4 streams.
With the P4 DAM and P4 (formerly Helix Core) integration, you can combine digital asset management with version control to fully sync your tool suite. You can also use P4 DAM with existing assets in P4, pulling in assets that are already stored in P4’s streams feature.
Here’s how it works:
- First, when creating a new project, use the toggle button to disable the “Automatically create P4 depot” setting.
- Then, set up your P4 pathing by selecting the depot and mainline that contains the P4 streams you would like to view and manage in P4 DAM. (Note: You can also import the same streams for multiple projects.)
- Lastly, set up your P4 DAM view settings and provide a P4 DAM repository display name.
This process allows you to work directly in P4 DAM while versioning in the background.

7. Invite team members to collaborate.
You own your P4 DAM projects, so you have the permissions to add team members. Use the sidebar functionality to view the dropdown menu and click on the “teams” bar. From there, you can select users to invite and give access.
As an individual user, it’s important to note that you can only add team members who have previously used and been granted access to P4 DAM. If you want to add a team member who hasn’t used P4 DAM before, reach out to your company admin, who can add them at the system-level.
If you have P4 DAM and P4 synced, you can add any users of P4 DAM or P4 to a project.
If you have questions about P4 DAM, get in touch with your account representative or contact us.
Not using P4 DAM yet? Test it out in our free, 14-day sandbox access.