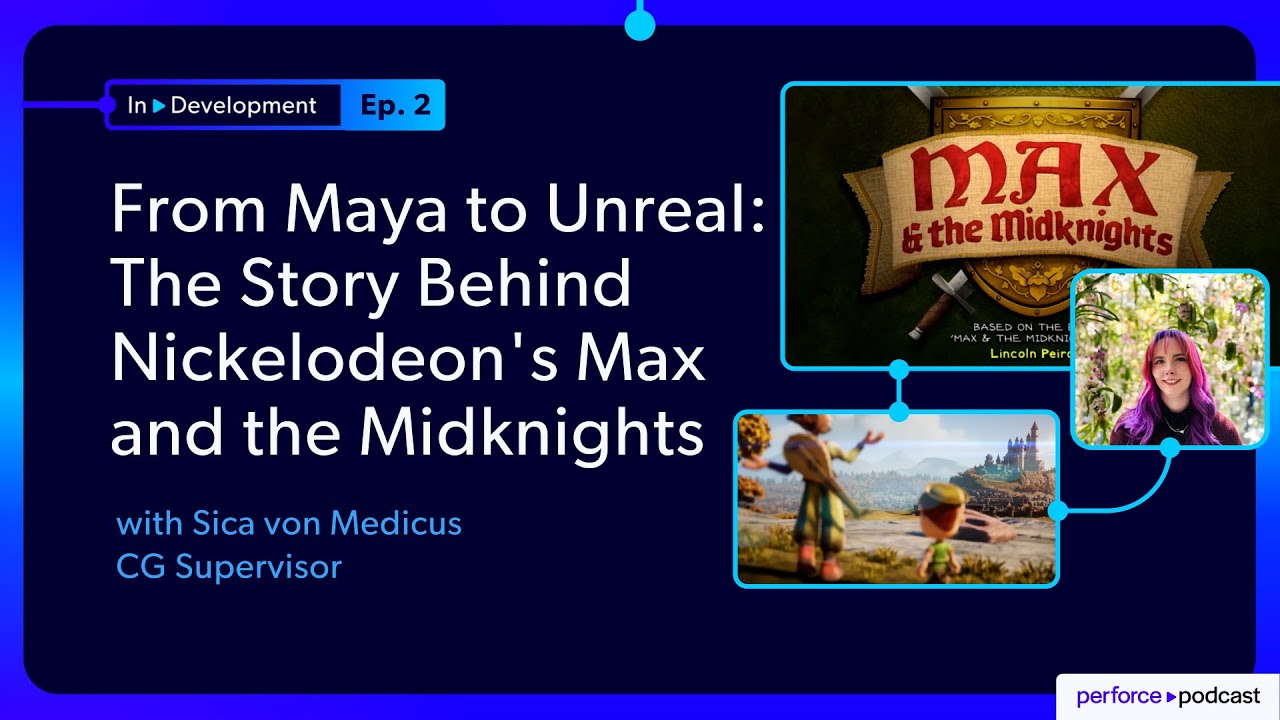
About the Episode
In this episode, Sica von Medicus, CG Supervisor on Max and the Midknights at Nickelodeon, takes us behind the scenes of one of animation's most ambitious pipeline transformations. Sica and Jase explore the messy reality of innovation, including:
- The leap of faith that led a traditional TV animation team to bet everything on Unreal Engine, despite having little experience with real-time rendering.
- Why everyone told them "don't use Alembics" – and why they had to do it anyway to preserve the expressive character animation they needed.
- How they invented a custom rim lighting shader when Unreal's limited light channels couldn't handle their complex character lighting needs.
- The creative workarounds for managing international vendor relationships without shared version control systems.
- What it really takes to maintain that "claymation" look in a game engine designed for photorealism.
This isn't a success story with a neat bow – it's the honest account of a team that chose the hard path, made mistakes, learned from failures, and created something unprecedented.
FEATURING
Jase Lindgren
Senior P4 User Advocate
linkedin.com/in/jaselindgren
Sica Von Medicus
CG Supervisor, Nickelodeon
linkedin.com/in/jessicavonmedicus/




Check Out More Episodes...
Ready or Not, Here Comes CI/CD: Build Systems for an Indie Sensation
Stephen Post, Technical Director
VOID Interactive
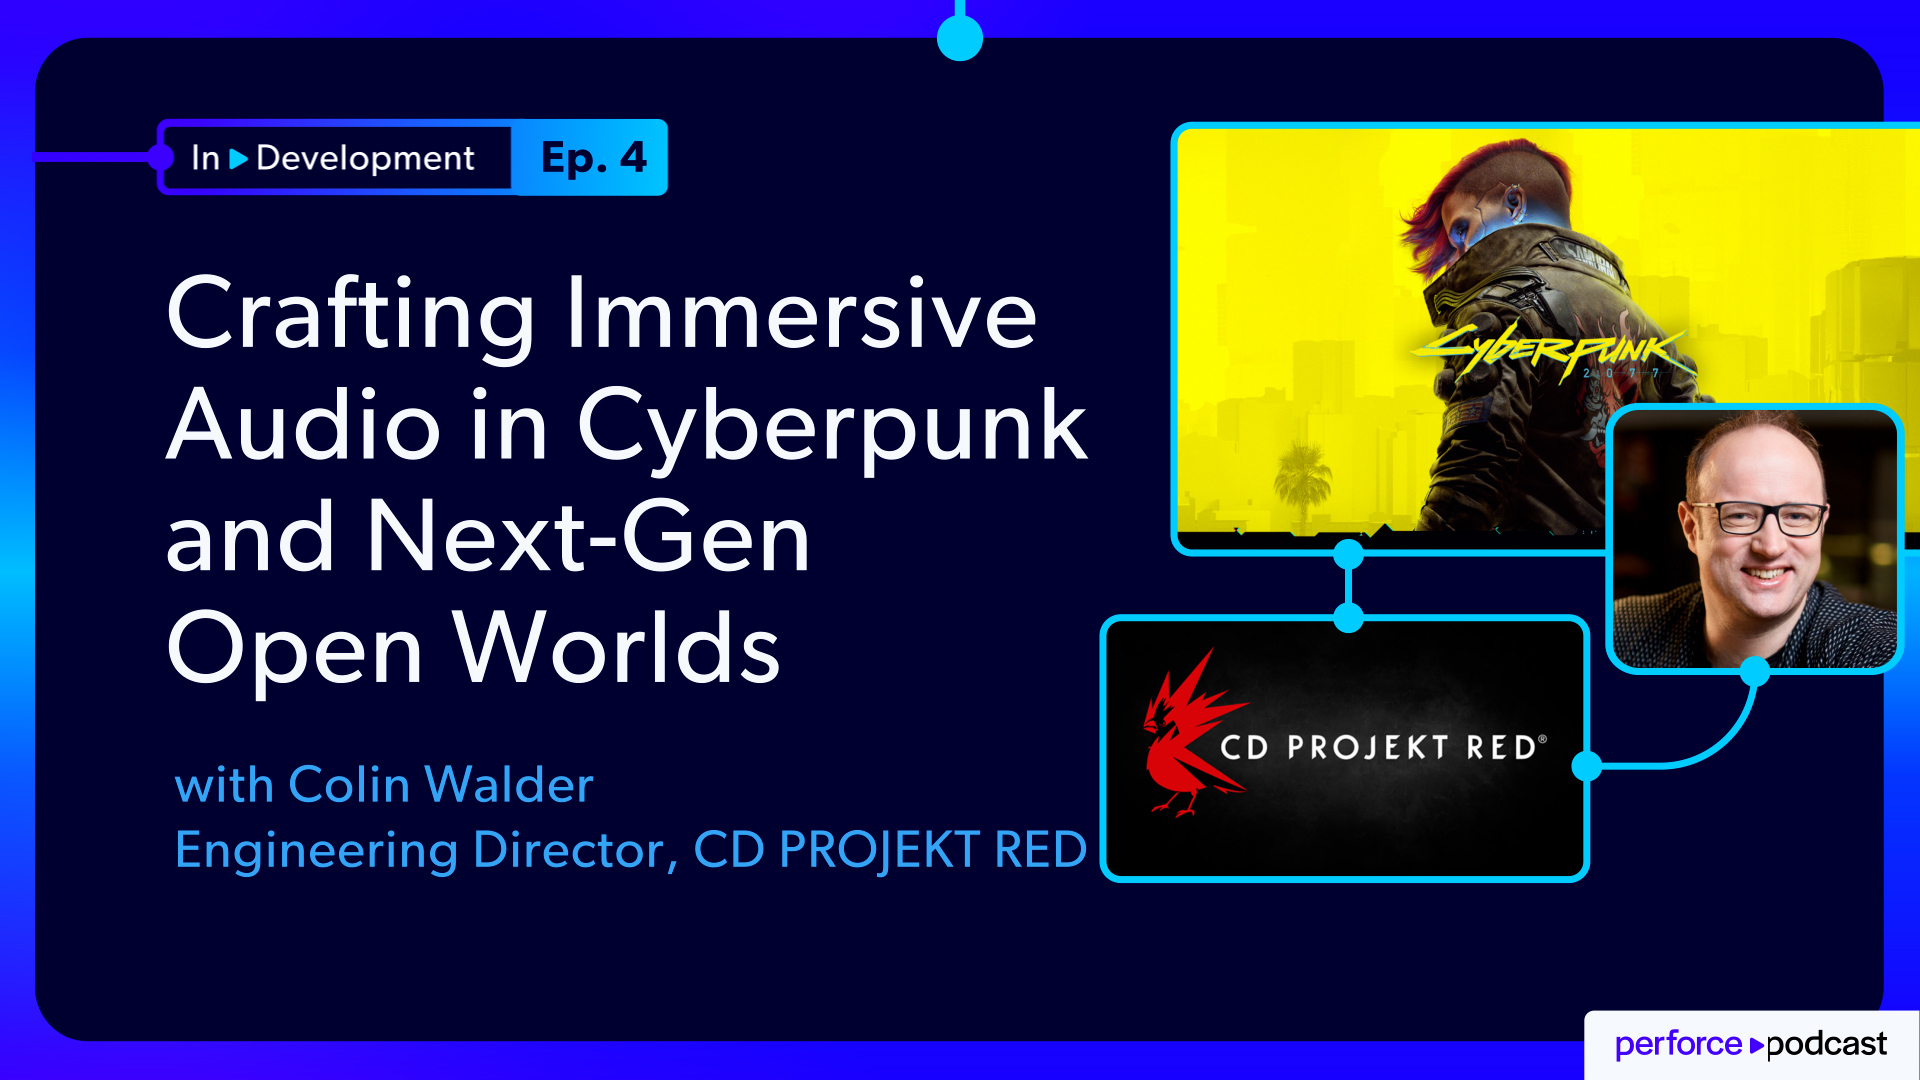
Crafting Immersive Audio in Cyberpunk 2077 and Next-Gen Open Worlds with Colin Walder CD PROJEKT RED
Colin Walder, Engineering Director
CD PROJEKT RED
Fail Fast, Fix Faster: Pipeline Wisdom from Halo Infinite to Virtual Production
Luis Placid, Engineering Director
ICVR & Shiftstorm Entertainment

Full Transcription
Our showrunner, David Skelly, had fallen in love with Unreal. When he interviewed me and brought me on, he was like, we're gonna do this in Unreal. I was like, alright. Let's do this. Most of us had not worked in Unreal in this capacity at all. I think I had done a couple side projects in it, worked on it in live action for a few backgrounds and things. But we went into it with our blind optimism, and we're like, we're gonna make this happen no matter what.
Welcome to in development, where we explore the technical realities of creating today's most ambitious digital experiences through conversations with the problem solvers who build, maintain, and optimize the tools, pipelines, and workflows behind games, animation, VFX, real time visualization, and much more. Each episode features in-depth discussions with technical directors, pipeline specialists, and digital creators who share their approaches to overcoming real life production challenges. Not just what they accomplished, but what went wrong along the way and how they approached solving those problems.
My favorite part of this job is getting to learn from so many amazing creators and to share my knowledge with others too. I learn so much from my guests on every episode and I hope that you do too. And with that, I'm so excited to get into this episode with Sika Von Medicus, CG supervisor at Nickelodeon for the animated show Max in the Midnights. Sika and her team are leaders at Nickelodeon by creating a brand new pipeline to do final pixel render directly in Unreal Engine for a full ten episode season.
I met Sika and her team when they were first getting set up with Perforce p four for version control several years ago, and we often run into each other at conferences. It's been so cool to see this project go from an ambitious idea that no one was quite sure how to do to a successful show that's now working on its second season. Sika and her team are proof that it's possible to do new things through being adaptable, persevering, and constantly learning. On this episode, we get into some of the amazing advantages of using real time tools for animation, the ways they had to adapt their traditional CG pipelines, and also the challenges that came up along the way because that transition is never as easy as you hope it's gonna be.
But in their case, it was absolutely worth it. I learned so much from this conversation, and I think that you will too. And with that, let's get into the interview.
Well, Sika, thank you so much for joining me today.
Of course. Thank you for having me, Jace. This is exciting.
Can you tell our listeners just a little bit about who you are and what you do at Nickelodeon?
Yeah. So I'm Sika Von Medicus. I'm the CG soup on Max and the Midnights. It's a show about a girl in the Middle Ages who wants to become a knight, but girls aren't supposed to become knights in this timeline, and she doesn't take no for an answer. So she goes on an adventure with all of her friends, and spoiler alert, at the end becomes a knight.
I could've I could've seen that coming. I probably could've guessed that was the outcome.
It's made in Unreal, which is really exciting, and it's on Paramount plus. So go check it out.
Yeah. And it's it's got a really cool art style where it has this claymation look to it. Yeah. I didn't realize it was gonna look like that when we first talked about the show maybe two, three years ago. I I know you've been working on this for a long time, but I didn't realize that it was that kind of art style because this was originally based off of a graphic novel. And so I didn't realize it would have that claymation style, it's really cool looking.
It was really fun harnessing Lincoln Peirce's look into CG and keeping it feeling like it was very tangible. That was one of the main art direction goals to make every piece feel like you were on a stop motion set and really lean into those tangible textures. We have all moving cameras, so all of our cameras really feel like you're on a set and there are real people behind every aspect. So I'm glad that came through.
I know a lot of what we're going to talk about is the work that went into how you transitioned your pipeline from, you know, years of working in more of a traditional CG pipeline to Unreal. But I'll just say from watching the show, if I didn't know that it was Unreal, I wouldn't have guessed it. Yes. You The fidelity of the rendering, especially of like the environments and stuff where it really nails that claymation look. Like, you think that you could actually touch the set and that they were real actual built sets. So that's that's really interesting. We'll get into more of how you did that a little bit later.
But could we start off by telling us a little bit about what is the toolkit that you use day to day, you and your team? And you can tell us a little bit about what your team is because I know it's not just in house, but also vendor studios that you're working set of tools you're using for all of that, and what's the basic overview of that workflow?
Yes. I'm glad you mentioned it's not a typical team. I mean, it it is. We are a vendor studio relationship.
So we have a small team at Nickelodeon, then we also have a team over in India at Eccentric Studios. We're hybrid Unreal and Maya. So all of our modeling, rigging, animation is done in Maya and then Look Dev, Previz. We call it viz, not previz.
And lighting and rendering is done in Unreal. And we come out to nuke probably five percent of the time depending on the episode for things like lens flares and just final tweaks.
And then we also use substance painter and designer for look dev, Photoshop for various things, Storyboard Pro for our our board artists, and we'll get into that in a little bit. And then we also use Premiere Pro, little bit of AfterEffects for some motion graphics, and we have these really cool manuscript shots where Kevin, one of our main characters, is an illustrator and writer. And so he does these incredible, beautiful, illustrated manuscripts, and so we use After Effects for that. I have been chronicling that very tale in this book I'm writing.
The reign of king Conrad the kind was happy and prosperous.
I didn't realize that that was a separate After Effects thing because yeah.
Yeah. When I watched that first episode, seeing that, suddenly, it's this different two d style of animation. Okay. So that's cool. That's where you'd switch to After Effects for that.
Yeah. That process could be a whole podcast in itself. It was fun.
Nice. Okay. Maybe we'll have to have you back again, and we'll talk about that.
A follow-up. Oh. Yeah. Then we use, our Viz team uses Git a little bit, and then our lighting and rendering and asset team uses Perforce for binary files and bigger files. And then we also use tracking software as ShotGrid.
Okay. Cool. And now is ShotGrid used across all the different departments? Like, that's the main way you're tracking across the vendor too?
The vendor has their own proprietary tracking service. So they they built out their own tool. They don't use ShotGrid. So we don't share ShotGrid. It's two separate environments, and we ship files to each other over Signiant, I think.
Okay. So all of your resources are shipped back and forth that way?
Yes.
So do you have them as part of your Perforce server, or that's separate for your team?
It is separate. The Nickelodeon Paramount security is very tight, so we are not we can't share. And we did talk about it and try to figure it out. But, yeah, it is just us, and then we ingest their files to build our own system.
When you're working together with these studios, you said you're using Maya for creating the characters and rigging. And then have you moved to doing any of the animation in Unreal, or is that still all just in Maya?
That's a great question. So we are still in Unreal five point one. We actually started four point two six and then went to four two seven and eventually moved up to five point one. Fast paced moving TV shows don't stop.
We had to stay in five point one. And so the animation tools weren't quite built there yet. We did test some things out. We have some FBX rigs that we use for our background characters and some crowd stuff.
But for the most part, probably ninety nine percent of our animation and everything is done in Maya. We import Alembics.
So importing Alembics into Unreal though for the actual rendering and playback?
Yep.
Okay. And so I think we're starting to get into the edges of how do we make all this work. Right? Yeah.
How do we get this to happen?
Let's start by setting the scene. Tell us, what was it that made you decide to do this show in Unreal in the first place?
I was brought on in fall of twenty twenty one. Our showrunner, David Skelly, had fallen in love with Unreal. One of our artists, Sean McPartland, was a PA at the time. He knew Unreal and was showing David Skelly they were on another show, our brother's show, Big Nate.
And Sean had set up some of the sets in Unreal and was showing David Scully, hey, we can fly around and, like, we can scout. And David was like, this is incredible. We have to do this. So then David was brought on to be showrunner for Max.
When he interviewed me and brought me on, he was like, we're gonna do this in Unreal. I was like, alright. Let's do this. Most of us had not worked in Unreal in this capacity at all.
I think I had done a couple side projects in it, and I knew it. And I had worked on it in live action for a few backgrounds and things. But we went into it with our blind optimism, and we're like, we're gonna make this happen no matter what. And, honestly, I think that was one of our best qualities is we dug in.
We had fun. That first year, year and a half was just experimenting and figuring it out and designing it and bringing our environments in. And, yeah. So that's how it became unreal.
It was a dream to be able to take the traditional CG pipeline, which is script, and then you do boards, and then you design, and build your assets, and move to animation.
David really wanted to shake things up and pull in a lot more of the live action feel. He worked on live action sets with the Muppets at Jim Henson. We didn't have motion capture capabilities at Nickelodeon, but he really wanted to take as much of that the goodness out of live action of being able to control the cameras, being able to look see things as much as possible before you get to animation.
And so we built out a Viz pipeline, which at the time, no other show at Nickelodeon had. We kinda adjusted the pipeline to work to feed our assets and things into our Viz pipeline. So we started with Script, and then we designed from Script. So we did all of our artwork and art concepts from Script.
We went directly from design into asset creation, and we created high fidelity models for the Viz team to start with. So we didn't worry about Lookdev and rigging at first. We just fed the Viz team with models. And then they created very low fidelity rigs to be able to put the arms down and move characters around the scenes.
They started filming in Unreal. So like a live action set, they'd have so much coverage, tons of cameras all around the scene to get a, b, c shots, and then fed that into the editorial pipeline.
And we had a very strong Viz editorial process or a story editorial process where editors take all the footage and then line it up and show the director. And the editors are making a lot of the story choices, which is really exciting.
So the Viz team is in there in Unreal, and they're using keyboard and mouse. We tried setting up some virtual stuff, but it just it just didn't work. And pretty much everybody that works on Macs is a gamer, so they're all good with Wafsa. Okay.
Got it.
So all the camera moves are kinda being driven that way. I wonder about I feel like you can't really tell.
Please tell me if you feel differently.
But And it didn't jump out to me.
No. I didn't.
No. I I'm really proud of of the way that's set up as Chris Perry, our supervising director and our supervising producer now worked with the previous team to figure out what worked best and Wazda just ended up on top and we added some there's this plugin called Cinemotion for Unreal where there's a huge library of keep alive camera effects. So we picked out the ones that worked the best. And then we also have a lens kit. We use the lens kit from Lord of the Rings, but we have a specific lens focal length that we use for every shop.
Okay.
Got very consistent.
And that was part of, like, things that you preconfigured in Unreal, you mean, so that you have those those focal lengths?
We kind of have it like a guide so that, like, the directors are only using these preset lenses.
Got it.
And then so they're operating every camera moves. Every single camera moves in our whole show throughout all the seasons. So, yeah, it's Nice. Really harnesses that live action feel.
So far in talking through this, we've gotten the kind of presentation about moving a production to Unreal. We'll tend to see it. Conferences or things like that where it's like, it empowered all these amazing things. We got to do it all in real time. Was so cool.
But what we're here to do on this show on in development is talk about it's never that easy. Right? No matter what kind of pipeline you're doing, no matter what kind of production you're doing, no matter how good your tools are, it's never quite that straightforward. So take us back again to you have this showrunner who fell in love with Unreal, really wants to do this.
You said you spent about a year kind of playing, trying to figure out how this was gonna go. What were some of the things you ran into then that you realized like, okay. We need to solve this somehow. This is a challenge.
Ugh. So many things. So to begin with, we really had to figure out how the pipeline was going to flow to make it efficient for the team. The first thing we had to solve was the Viz team needs assets to work with.
In a typical linear pipeline with Viz to animation, they have a modeler who does very basic blocking. It's scaled close as possible, but usually, it's very blocky. For us, we didn't quite have the time for that. We didn't have the time to iterate.
We really needed everything that came out of this to be ready to go. We basically built out our Viz team is basically a blocking and layout animation team as well as Viz. So what we did is we worked with the vendor studio, and we moved up the asset pipeline, like I said, and had all of our models and environments pretty much ready to go first pass. We were still noodling some things.
And in the first couple episodes, we learned that we really had to adjust it so we weren't noodling things. That was one of the biggest challenges that we ran into Because we wanted to use these the cameras and the layout and everything from our Viz team, we wanted to be able to hand that seamlessly to our animation teams to work in Maya. We learned that we couldn't hand our Viz teams anything that wasn't polished. So our environments had to be set dressed before the Viz team got in there, especially with our characters too.
They had to be the right scale. You know, if we had hair that was sticking up, you could have a camera going through hair and animation. And so it really one of the biggest challenges was set mismatches and character mismatches. For, like, I think the first ten episodes of our first season.
We had a lot of mismatches, and we're building these tools to see, like, what was wrong. Like, why does the camera not look the same now when we get into animation? And that was probably one of the biggest challenges, and we've squashed it now. We don't have that problem anymore, but we really had to make sure those assets were as high fidelity and as close to approved as possible before the VizTube took it.
Yeah. I mean, when you mentioned that about still noodling causing problems, yeah, my first thought was, oh, because this plant moved over a little bit and so now it's blocking our camera's view or something like that. Were there any other, like, weird things that happened that you wouldn't have expected? Yes.
Like, how I'm trying to think what how what else could have happened besides, like, you've shifted your whole coordinate system, and so now all your cameras are in the wrong place, things like that.
There were a lot of a lot of interesting things that you wouldn't think would be a problem. I mean, I guess if you're in Previz pipeline and you've done this for years, maybe you think of it. But if a tree was slightly off and it would block a character or another thing that would happen is a system or foliage part of the pipeline came after modeling in the beginning. Sometimes trees weren't there.
So we'd get to lighting and rendering, and we're like, oh, we can't see anything. And now we can't also have our beautiful grass that we laid out. That was a lot of back and forth, and our render studio was incredible about making changes and and getting things to where they needed to be, but there's that. There was also the Viz team turning things off or moving things.
That was a big thing we had to figure out. Like, these sets needed to be locked in. And one of the interesting things we did, so we like I said, we build all of our assets before we get to Viz, but then we also have this small asset build phase after Viz where we go through the episode and call out anything. It's something I haven't talked about, which we'll get into here in a second, is our storyboard phase and how that comes in.
But things get added during the story process. So we would call those out, add additional props. The Viz or storyboard team might add a prop for a new gag or whatever.
Okay. Makes sense.
Yeah. But one of the biggest struggles was if a barrel got moved because of his team where the director wanted to get a certain shot, in the first, we didn't have any indication that they would move that. No one's catching that. They don't know that they shifted that barrel to units. And so what we started to do is we told the team, number one, please don't try to move anything. But if you have to color it, put a shader on it so we know that one moved, and we can immediately see in in the animatic that it was moved. And then I would talk with the vendor studio, and we'd either do the asset move on a shot basis, or we'd update that for the default set.
Yeah. Were you able to you know, since they're actually changing it in the Unreal project, were you able to have them submit that back so that you could incorporate those changes?
Unfortunately, the system didn't quite work that way because our animation and final teams at the vendor studio aren't using the Viz team files. The way the Viz team worked, it was we didn't have a lot of time for them to be submitting their projects up for version control. We really only tracked the camera data and a little bit of the animation.
It just unfortunately, that was one thing we never figured out. It would have been great, but we also didn't really want them making changes. The way that it worked out is we just we needed to keep moving forward. And at the time, making those changes didn't make sense for it. So we just caught what we could and tried to not have them move too much.
Got it. So, yeah, I I think we're ready to go on to that storyboard part.
Yeah. So one of the cool things about our show is, obviously, we're in Unreal, and we do Viz in Unreal. But we still really harness the high fidelity acting that board artists can bring. And so what we do is our Viz team, they work for about four four weeks with the director filming the episode, doing what we call the cinematic pass of our show.
And so that's all, like, the camera moves and the rough blocking and stuff like that.
That's what's happening there.
Okay. Yeah. And they spit out basically a a CG playblast from Unreal, CG renders, and pass that to the board artists. And so the board artists bring in their shots.
They're all moving an MOV into Storyboard Pro, and they animate they draw on top of it. This allows them to not have to worry about any of the environments. They don't have to draw backgrounds. They just have to worry about the characters.
A lot of them love it because they can just focus on the acting, but then sometimes it could be challenging because it's you have to track the character through and and make sure you're animating it. So we didn't ask for full boarded animations. A lot of them just follow the character and pin to the character. So sometimes they'll jump, but as long as the acting and expressions and personality is there, that's what matters.
And so then they would take these shots that they'd drawn on top of to get all of the expressiveness of the characters. And then what's the next part of that pipeline there?
Yeah. So after that, we have an interim a huge crucial part of our pipeline, which is the import and export process. I'd say export and import process of all of our cameras and all of that data to our vendor studio to import into Maya. Chris Perry, along with our pipeline, TD Grant, they both built this incredible tool that pulled all of the FBX data and all the camera data out of Unreal and packaged it nicely to send to our vendor studio for them to ingest into Maya.
So all of our camera data, all of our moving character FBX data gets brought into the animation process. The animation team can adjust the cameras, but pretty much everything is already baked down and there for them. So they do have the ability to move or key on top of the cameras if they need to. And they also can see the reference of the Viz team, the FBX blocking stage.
They can see that if they want. Here's another challenge that we faced. When we first started, we didn't have that. So we were transferring cameras.
We would give them the camera data, but then they wouldn't have the FBX data. It is a massive amount of data. And when you're shipping it back and forth to a vendor, there's so many challenges that we had to go through there. We tried to make it efficient in so many different ways.
But because we couldn't have a seamless environment where they're accessing our files and we're asking ask theirs, we really had to figure out how we get their data in and how we give them our data. And we did a lot of scrappy workarounds, but that's the name of the game.
Yeah. Yeah.
I I come from I come from working freelance at studios where you just you just have to get it done, and that really that really helped us. So what we did in the beginning was we would just send them our Unreal files, and we would have them ingest the FBX cameras and get that.
So they had a whole So they did that all on their own before you had this automation to package it up nicely for them.
Yeah. So for the first couple episodes, they were bringing things in, and they had this process before they started animation. And thankfully, Chris Perry, our supervising producer, and and Grant had the time to get together to build this tool. And it basically just was able to run, automate all of what we built in Viz and package it up nicely.
And and and that sounds so nicely wrapped up because I'm it was months of work for them. But, yeah, they were able to make it nice and seamless, so it cut weeks of work off of our timeline and then also allowed the vendor studio to start immediately in our, what we call, our key pose phase and and have everything they needed. But before that, it was it was very scrappy. We were worried we weren't gonna get episodes done, but I would say our story is one of tenacity and plowing through and making sure we get things done and seeing the end goal.
And so then we talked a little bit about this before we got on this call, and that was about then bringing those animations from the vendor back into Unreal for that final render. And you mentioned before that you're using Alembics. What led to that? What's kind of the story there? I wasn't even aware before I first talked to you a few years ago about this that Unreal could handle Alembic like that. I'd never been involved in that kind of workflow.
Yeah. So it's very interesting. And I think when we first started talking about our process, we were talking with Unreal and asking, how do we do this? You know, what's the typical process?
And everyone was screaming at us. Don't do Alembics. Do FBX. Don't do Alembics. It because Alembics are gigs of data.
So it takes a decent amount of time to get those Alemics into Unreal. And not only do you have to get them into Unreal, but you also have to export them from Maya. And then if you're passing information back and forth, it just it adds a lot of time. It adds a lot of data.
You need a lot of storage. It just it's exponential. And with FBXs, it's smaller data size. Unreal reads it well, and you don't have these long import times.
From the outside, everyone obviously was saying, do FBX. Don't do Alembic. However, we kinda had no choice. We tried.
We looked at it. We talked with our Abhishek, my partner at Eccentric Studios. We tried to build our characters with FBX, but there were a couple factors that kept us with Alembic. Number one, one of the biggest choices I had to make when I came onto the show, and I say this so many times whenever I'm talking to people, is I had to decide what we keep doing the way that we've done it, the way that we know works, the way the studio and Accenture has been doing it for over a decade and has been delivering these incredible shows.
What do I take and keep, and what do we move to Unreal that makes sense? Because we can't start from absolute scratch. That doesn't make sense.
Why get rid of things that are working Right.
Just to start doing something that might not work. And one of the biggest ones was our rigs. We already had a lot of characters that have already been built for our brother show, Big Nate, and we were gonna be re reusing a lot of those characters. And then additionally, on top of that, our rigs are really robust in Maya.
We have a lot of face deformation, a lot of blend shapes, which we can bring into Unreal, but a lot of, deformers and face controls. All of our rigs are squashed and stretched. And then we also have a lot of visibility toggles. So we built this really awesome you'll see in the show, our eye rigs are very unique, and no one else at Nickelodeon had anything like what we had for our eyes.
So we had to build a fresh eye rig, and we have switches for our eyelids and our eyes. And then we have these squinty eyes and straight eyes, and we have these big, expressive white eye cards when they're, scared or or excited. And, those are all driven by VizToggles, so visibility switches in the rig. And that was really complex at the time for five point one.
Now in in current versions of Unreal, it's a little easier. But in five point one, it just it wasn't there. So we stayed with Maya and built all of our rigs there, And that is why we didn't animate in Unreal, and we had to use on Alembic. But, yeah, obviously, we were cautioned against Alembic, but we made it work.
And I think one of the saving graces for us was that we already had an Alembic pipeline.
So Eccentrics already was exporting Alembic for use for traditional all all the other shows that they worked on. And the way the reason they did this was so that when the lighting team in Maya using Redshift, when they were rendering, they didn't have to worry about heavy rigs or anything. They would just use Alembic. So Eccentrics already had a pipeline and tools built to automatically export Alembic once animation was done. So we didn't have to build any of that for our pipeline. We just utilized it and instead built a tool to take the Alembic into Unreal.
And then so what was involved in getting that in Unreal? Was that tricky at all, or was it just like, yeah, it works. It's just that it's heavy.
A couple things. A few things that started out is I talked about those visibility toggles. Those were the bane of our existence, to be kidding. We're very excited about this awesome rig that we built, and it it matched the style perfectly and really gave us that Lincoln purse style.
But then those visibility toggles through Alembic into Unreal caused especially in five point one caused a lot of random errors. As we all know with any software and any DCC, you run into random things. You're like, why does this work this way? And then the software creator is like, why are you doing it that way? And you're like, well, we have to.
Yep. Definitely run into that many times. Yeah.
All the time. And it's fun. At the time, I don't think we thought it was fun. But looking back at it, I'm really proud of us.
I remember sitting sitting on a call with Chris, and Abhishek had flagged that bringing in the eye rigs in the eye geometry through Alembic into Unreal, they were getting problems. Basically, what was happening is the eye animation was a couple frames off or, like, half a frame off from every other animation. So you'd get these weird issues where the eyes would, like, scoot over or, like, the eyelids would turn on a frame or two before they were supposed to. And we couldn't figure out why this is happening.
We were just we're digging through everything, trying everything, and we figured out that through just watching what was happening, we're like, clearly, the animation, it's like it's being keyed at a different rate or something's happening.
And so I think we had asked Epic at the time, but I don't remember if they knew that it was happening or if they didn't know what was happening. But I just remember Chris and I sitting in a room and we were like, this is what's happening. It was our end of day. We couldn't continue working, so we sent that to Abhishek.
And we're like, we think this is it. And we found this attribute. It was like a a frame rate attribute in in sequencer for that piece of geometry, and we could adjust that. So you're trying, like, negative point zero zero one or, like, point zero zero zero one and trying to see, it was, like, so close, but it wasn't perfect.
So we sent that to Abhishek through email. We were like, we think we're onto something. Take a look at this. And I remember he was like, no.
It can't be that. And there has to be something else. And then he came back and he was like, nope. It's definitely this.
And this is the exact number. I just played with it till I got it.
Okay. Nice.
Anyway, it's point zero zero zero one or something or two. I don't remember the exact number off the top of my head. But yeah. Just those moments looking back is really fun and exciting because you're just you're digging in.
There's no documentation. There were only a couple other shows doing what we were doing, but a lot of them had built FDX frameworks, not Alembic. And and, obviously, we were running into issues that no one else would because of the way that we'd set up our rigs and but, yeah, it was a huge a huge challenge that we faced, and we overcame it. I was really proud of us.
Yeah. That's that's also a great example of actually leveraging having people in different time zones where it's we have to be done now, but we're gonna pass this off to someone who's just starting their day, and then that actually worked out. I love that. Yeah.
It did. It did. Yeah. It was the partnership has been really great. So we can we can work on some things during our time and then and kick it back to them and be like, hey.
Try this. And then they'll with their fresh minds in the morning, we'll tackle it.
So we've been moving our way through the pipeline here, and, you know, we talked about this Alembic challenge. My my takeaway and tell me if I'm oversimplifying this, but my takeaway is just that to get the level of expressivity that you wanted from the characters' faces, that's the key reason why you needed the Olympics. Yeah. Is that correct?
Do you That's probably the top reason.
Yeah. Yeah. Definitely.
Yeah. And so then we're now coming back into Unreal. We've imported these Alembics. I'm assuming already have our cameras set because those were done during that viz process.
Correct.
And so now we've got the animation. So do you just press go and you're done? Or what's left in the pipeline here?
It's never that easy, Jace. Everyone knows Unreal is good at rendering. That's the whole point. Real time real time rendering, that's the main reason everybody gets into this is to get that fast, immediate result. You don't need to render. You can see what you're gonna get in viewport. And that is one of the big attractive things about using Unreal or any other real time software.
We really wanted to harness that throughout our pipeline as much as possible. Lookdev, texturing, being able to see what we're doing immediately and change things on the fly. In a traditional pipeline for Lookdev and lighting, you have to render everything out. You spend hours waiting.
You don't get to see the final result. Maybe you get to see it in a little viewport, but you don't get to see that. And we really wanted to incorporate that into our processes as much as possible. So in a traditional TV CG pipeline, you do your boards, you do your assets, you do your animation, and it just you just move from one thing to the next.
If you have to go back, it's a discussion with your producer. You know, we really wanted to make things a little bit more agile and be able to move backwards or iterate or or change things if they weren't working without causing an upset. So you talk about the cameras being set at Viz. And for probably ninety five percent of the show, they are.
But one of the awesome things about using a real time software like Unreal and the way that we set up our pipeline is we could correct any cameras. So if the animation isn't working in animation and if the composition's not right, our supervising producer or any of the Viz team could quickly change a camera and just ship that back to the vendor studio. They'd update their Maya file, have the new camera. It'd work with their animation, and we're ready to go.
And we can keep moving. And even up until we're rendering, we can change any of the camera attributes. We can adjust depth of field. We can adjust the focal length to move a camera around or reship a camera if we needed to.
So that was huge for making sure our compositions and our show had the highest quality throughout the process.
And then additionally, like I said, working in a real time pipeline, we utilized the ability to render early. And once The first pass of animation was done, we were able to start lighting.
So we began really early working on it. So you're not have to wait till that's final.
Wow. Okay. Yeah.
That makes sense.
And so in a traditional TV pipeline, you might be able to start set lighting, environment lighting, character rigs a little bit early, you know, a little bit alongside animation. But we were able to take camera data from the animation and the Viz team and put that into our environment lighting. So you could fly around the environments. You could see exactly what you're gonna see in the final episode and know exactly what you need to focus on for environment.
So you don't have to light everything necessarily. And also, you have Ahead of time, you know, oh, I'm gonna only see these angles so I don't have to worry about this corner of of By Jovia. We have these giant sets. We have these enormous sets of our main city is By Jovia with huge castle.
And Right. One of the great things is that we we know all the camera angles ahead of time. We know everything that's gonna happen, so we can decide where to put the details. And and then on top of that, we've got near real time rendering.
Because we are a TV show, we don't have to necessarily be exactly real time, so our renders take about thirty seconds a frame.
But it's still way better than twenty four hours or whatever.
Yes. Yeah. Yes. Maybe two hours a frame. Yeah.
I think depending on what it is, like, very heavy effects shot would take about two hours in an old older pipeline, and then others would be five to ten minutes. But still, that's thirty seconds a frame versus five to ten minutes.
You're you're you're just Perfect.
And multiply that by all the frames in the show. Yeah. It's huge.
Exactly.
I did wanna come back for a second to what you were mentioning.
Of Viz, you kinda know what parts of the city you're gonna see and where you need focus on the details. I know that this is a really common issue in virtual production where you need things to be sixty frames per second real time on the LED wall while you're filming.
And there can be problems where if you don't know ahead of time what you're gonna see and what you're not, either you end up where you've got this huge five million polygon rock that's way in the background. It takes up like two pixels on the screen, yet it's hurting your performance because you have this huge asset there that you didn't need. Or the director says, oh, let's look over this direction a little bit, and now you're looking at stuff that wasn't finished.
Finished.
I'm curious, like, what was that process like in terms of how much of the city was finished? Because it sounded like you were doing a lot of that modeling actually earlier in the process. How did you handle that? How much detail to put into different areas?
That was definitely a huge process that we had to figure it out. A lot of it came from just dissecting the scripts and knowing exactly where we were gonna do things. We had what we called location scouts with the directors. So we would do a blocking pass of the models, and then we'd get in there with the director and showrunner and Chris, our supervising producer.
And we would take a look at the set and be like, this is where we're gonna film. Like, these are the aspects. This is what we have. And the director would say, focus on these areas.
This is where I'm gonna film. And this area, I'm not gonna use as much. Or I don't think they would actively say that. I think me as a CG supervisor would kind of assume that and figure out where to allocate the most time.
That being said, that is why we did have that follow-up, what we call our slot b shipment, where after the team was done filming and storyboarding, if for some reason, our initial plans changed and they really did need that alleyway, we had this small sliver of time where we could have the team then go back in. But the majority of the set was already built out, all the textures, all the shaders, all of that was built.
So just placing more set dressing props and Okay.
It's a lot of medieval style. Right? So it's lots of, like, shingled roofs or thatched roofs, a lot of wood textures, dirt textures. So it's kind of that like, oh, yeah. We're able to add those Reuse. Because we already have them. Right?
All of ours our houses were modular. So we had, I think, like fourteen houses that we used and then we just I could talk a whole podcast about our asset creation part, but, we would swap the shingles for hay and just make it like, that I'm telling you this, you can go back and look and you're like, oh, I see it. But it worked out really well.
Can look for that. Yeah.
Yeah. It worked well. You can't really tell that it's I mean, if you think about it, even in modern times, all houses look the same. They just have different coats of paint.
Right. Maybe different modules sticking off the sides.
Yeah. We had the same approach for By Jovia and other aspects.
I would work with the directors and find out what they needed, try to accommodate it ahead of time. And then we would also again, because we're a TV pipeline, we we had to work with what we had. The directors were incredibly good at that, about finding unique angles with the sets that that already existed. And I think that was one of the amazing things about being in real time. They could get in there and fly around it and see. So they had a larger ability to make do with what they had because they're not starting just from drawings. You know, when you're starting just from drawings, you don't fully know the environment that you're gonna be in and so that was a a huge benefit.
Yeah. The fact they can actually see it. Exactly. Such a cool feeling. I love that.
It is. You'd be surprised how many unique angles you can get from just a one room house.
So then you've brought it to this point, and you're doing the the lighting and everything. And you said that you're able to start lighting as you're rendering and then having the producers look at the animation as it's being developed. Are they also seeing it with more and more final lighting on each go around? Like you're able to update the lighting as you're rendering out new passes of animation?
Yes. That's a great question. So we started out with animation kinda working alongside lighting but not fully integrating. The animation team would pass cameras and animation to the lighting team, and then they would use that for their set lighting and it worked in tandem.
In parallel, but not In parallel, but not together. We light our environments first. So we we have our By Jovia, and we needed a daytime of day. We light that first.
We get all the atmosphere, the fog, the direction, the shadow, the quality, all of that in there first.
And then the way that we judge that is by various render and camera angles from the episode. So we do ten to twenty camera angles from the episode, render those out, do some wide shots, make sure it looks good.
We get that approved. And then we move on to our what we call scene lighting, and that's our individual shots. So we pick our key shots throughout the episode that we know are key moments that are gonna drive the story driven lighting for the episode. So we have about twenty key shots for a twenty two minute episode, and it's moments like the dragons breathing fire or, you know, it's a new time of day that we've never done before.
Or if we want special ray lights or sparkles or anything like that, we will color script that and created a key shot. And so those are the shots that we develop during our scene lighting process. And the setups that the team makes within that get used throughout that entire scene. Our scenes are sequence of shots, and then we have acts and an entire episode.
But yeah. So then the team develops those lighting scenarios, saves those out, and uses them for the entire sequence of shots or scenes.
Then from there, we have what we call our UE render pass. We call it our UE render pass because what this is, it's all of the animation automatically pulled into our environment lighting and any a little bit of our special lighting.
And we render all the animation in our lighting. That way, we can see, are things floating? We can see if any textures are broken. We can see if the lighting's working.
We did talk about incorporating each pass of animation into Unreal. This is one of the limitations of using Alembic because it's long. Even automated, it takes time for the Alembic to load in. So that is one of the shortcomings of using Alembic, but we were able to make it work.
And you've seen our show. I'm very proud of it. I'm a lighting artist at heart. Started out as a lighting artist.
Okay. I'm so proud of the lighting that we've been able to accomplish.
Yeah. So I think that's part of what makes it look real in terms of that claymation kind of style is not just how the lighting is set up, but also how it's rendered. Doesn't feel like a game engine type render. You can really see that. Yeah. Much of that is the stuff that you had to come in and and tweak, and how much of that is just that Unreal has come so far in the last few years in terms of their rendering?
So a lot of it is stuff we had to tweak. The vendor studio and me as a lighting artist coming from Maya where we had tons of channels to Lightlink. We could get really crazy. You could use AOVs, render layers, bring things out to comp, and tweak things however you wanted.
We had to learn how to harness Unreal for what we wanted to do. And I think by default, Unreal is excellent at doing realistic rendering. Doing more stylized things, especially in five point one, was a little more difficult. But because we wanted to do the stop motion, we wanted it to be stylized but feel real.
Right. So a little of each. Yeah.
It's a little bit of both. So we were set up for success for the beginning. So I would say a little bit of the tool was already there, but also a little bit of we had to figure out how to get tool to do what we wanted. So for instance, we had a ton of light linking capabilities in Maya.
But in Unreal, we only have three light channels. So we have zero, one, and two. So we had to develop a couple things. We created this what we call our rim shader.
It pulls from the same, facing ratio style shader that games use a lot. We pulled that same kind of technology and created our rim shader, which allows us to put a highlight, a rim light on our characters. On any side, you can adjust the softness, the direction, the color, intensity, all of that. And that eliminated our need to have extra lights on our characters to do those kinds of things.
Interesting way. So you're telling me that rim lighting effect is achieved just through a shader rather than having to set up lights to recreate that. Fascinating.
It's been our secret weapon route because when you have four characters and can't light link, the lighting setup has to be the same for all four characters. So when we're trying to enhance or pop a character off the background, we're like, how do we do this? You know, if you have a rim light here on this character and this one's standing in front of him, it's gonna block him. And so we we developed the rim shader.
Perfect. That's that's awesome. No. I I love that because that that rim lighting just always makes everything pop in in real life filming as well as, you know, in in three d animation. So that's that's really clever to make that be part of a shader instead.
It was probably one of our biggest innovations to to just solve that lighting problem in general. And also, because we have to work really fast, the teams can't be trying to noodle and move the lights forever. They they need it to just happen, and so the room shader made that really efficient and fast.
I I love it. I feel like I definitely am ready to go make my own feature length three d animated thing in Unreal.
You got this.
Yeah. Yeah. All I'm missing is the skills in modeling and animation. I've gotta get those. But once I've got that, no problem.
Sorry. Thankfully, there's people out there to help you.
Yeah. For sure. No. Very cool. I definitely hope people check it out. So as we're wrapping up, I did wanna spend a little bit of time getting into our time machine. So you've been working on this for about four years.
If you could travel back in time to yourself when you were just starting in on this project, is there anything that you would tell to your past self to prepare for or to do differently or to approach differently?
So I've thought about this a lot. I am usually the kind of person that believes challenges and mistakes are there for a reason. We don't grow unless we are challenged and unless we make mistakes.
In logic, I wouldn't go back and change a thing. However and and I I will say that just because so much of what we went through shaped every single one of us and not even just creatively. The production team, we went through the trenches together and that made us who we are today. So I wouldn't I wouldn't change a lot of that. I would do things different if I knew what was coming, of course.
Right.
So I will say in a perfect world, I would have started pipeline tools and really focused on harnessing the efficiencies a little bit earlier. Not say less on creative. I would just say we we'd also give an equal amount of time to developing tools, making sure we were starting sooner. A lot of the challenges that we faced were kind of out of our hands and not even our fault.
So many of those things I would love to change, but some of it is just working with other people, working within systems that are already established. So I would love to go back and be able to do things a little bit more efficiently. I would love to have, you know, an internal lighting team and more artists. Honestly.
I think that's probably every CG suit Sure.
More artists.
Request is Yeah. More artists, more hands. We really did it with a scrappy small team and was so impressed with each and every one of the team members. All of our artists and production staff are are top notch, but I know they were working very hard. And all of us, I think, were like, we could have used two or three more people just to make things a little easier. And one of the things I will say that I wish we had been able to get to work was we tried to set up a remote system with our vendor studio where we could get into their computers and render or make changes.
And due to things out of our control, Internet service providers That would not work well together I see.
We had it. We could get connected, but it was so slow, and it was just not usable. I wish I could go back and get that to work. Yeah.
And then now switching gears, for someone who's either newly getting into your industry, so into CG animation, or someone who's maybe shifting into that role from somewhere else in the industry. What might help them have the most success?
I believe a lot in in personal relationships when it comes to working with people. I think you need to be humble. You need to be kind. If you know what you're doing, just own that.
But be a nice person to work with. As someone who hires people for my job, you could be the most experienced person at what you do. But if you're not good to work with, then you're not gonna get the job.
Knowing your strengths and being able to work with people, motivated, being able to take direction is some of the most valuable skills you can have. Whether you're moving into the industry from something else or a student out of college, whatever it is, having that drive to solve problems, to do new things, to dig in whenever the team needs something and you are tasked with something that maybe is out of your comfort zone, just go with it. Enjoy it. Find the process and be communicative and be a team player.
I know that's the thing that every HR resource person will say, but I really mean it. And when I when I say team player, you know, we're in the world of Zoom these days. I know some people are in office, but we're in the world of Zoom. And speak up in those Zoom rooms.
Be who you are. Be yourself. Show your uniqueness and what makes you, and that is more valuable, I think, than the years of classes or anything that you've taken. Obviously, those are important.
You need to show You need that you can do the job.
Yeah. But I think, you know, I would hire someone who gets along with my team and who I know will work well with my team over someone who has five more years experience any day. Yeah.
Yeah. I've even found in the past working in VFX studios where sometimes the people with a lot of experience could be the hardest to work with because they'd worked in one way, and they just really struggled to adapt. Whereas you'd have someone who's newer who picks it up right away and would be your star. You're like, okay. I'm gonna send all my VFX shots to this person because they just they're willing to work the way we work. Yeah.
And I think that's advice for millennial, and we're starting to get older. And those above me who have also been in the industry, just take a breath, be humble. Remember, you don't have to be scared of the new people coming in. You really don't. Just continue to do what you know. And I know we've all had tough working situations, so do what you can to continue to make those working situations good and welcoming to everybody from all walks.
So Well, thank you so much, Sika.
This has been great. I feel like this has been years in the making since we first started talking about Maxinth at Midnights. It's been really cool to see going from just talking to you about it theoretically to then your first season coming out.
And now you're working on season two or you're We're working on season two.
We're mid season two. Cycle one is premiering on cable and Paramount plus, but we are mid cycle two.
Okay. Nice. So we have more to look forward to. And I'm excited to to maybe chat with you again soon to hear about what's changed from cycle one to cycle two as you're upgrading Unreal Engine. I'm assuming that's happening over time and kind of further refining your pipeline.
I'd love to talk about that at some time. That'd be great.
Awesome. Well, thank you so much.
Thanks for having me, Jace.
If you enjoy this kind of in-depth conversation with leaders in the media, gaming, and visualization world, be sure to subscribe so you get new episodes as they come out. Subscribing and giving a review or rating is the only way that we know you enjoy this content so that we can keep making more of it. Reach out to me via email or LinkedIn with feedback, guest suggestions, or to connect if you'd like to be a guest yourself. I'm always looking for great stories and I love learning about the many ways game and real time technologies are being used today.
Links for that are in the episode description. Be sure to check out perforce dot com for information about our full p four platform based on the industry standard Perforce p four version control. Special thanks to our production team, Ella Reiswig, Kaylee Torres, Luisa Puhala, and Chris Perez. I'm Jace Lindgren, and I will see you next time on in development.