Blog
November 26, 2019

Many teams use Atlassian’s Jira issue management system. It helps them store and track work items including user stories, issues, bugs, and more.
As developers work, they need to go into Jira to get work items. After work is completed, they need to go back in and explain what has been done. Going back and forth between applications can be too time consuming for teams. This means developers might skip updating Jira, which can lead to other issues, especially if you are on a large team.
Back to topHow Helix Core Solves Jira + Version Control Problems
Helix Core –– version control from Perforce –– helps teams get work done, fast. To keep teams productive and to enhance visibility into changes, Helix Core has a Jobs feature. This allows developers to get work items from Jira without having to leave the Helix Core interface.
Use Helix Core Jobs
Using Helix Core with your issue tracker allows developers to get work items coming from product managers or scrum masters working in Jira. When the changelist is submitted, the job can be closed.
With Jobs, you can create your own, customized spec to better manage data and workflows. This enhances collaboration and communication across your teams. And it gives greater visibility into development.
Teams can create, browse, update, and and delete work items right from the command-line (P4) or in Helix Visual Client (P4V) on Linux, Mac, and Windows.
Some teams use Jobs exclusively within Helix Core. Although this is valuable, the usefulness is amplified when Jobs is used with issue management software, like Jira. It's what allows you to track enhancement requests, problem reports, and other user-defined tasks.
Get the Helix Defect Tracking Gateway
To help developers switch contexts less, we offer Helix Defect Tracking Gateway (P4DTG). It integrates third-party defect tracking tools, like Jira, with Helix Core.
Implementing Jira + version control means less jumping in and out of different interfaces, which can impact development productivity. P4DTG works with your own Jira server or with Atlassian’s Jira Cloud. It lets you specify how data is exchanged between the two systems and replicates data according to your specifications.
Back to topStep-by-Step Guide to Jira + Version Control With Helix Core
Before You Install P4DTG …
Before configuring P4DTG to connect Jira + version control, plan the fields you want to transfer between the two systems. We recommend transferring the minimum amount of data necessary for developers to efficiently use Jobs. You’ll need to add fields for your Jira data, plus the four required fields for P4DTG.
For example, you can include a Jira issue’s summary, description, assignee, and project. And from Jobs, you could include the changelist numbers and descriptions for the changes. Once linked, you can see the changelist number right in Jira.
Customize Helix Core Job Specs on Windows 10
Once P4DTG is installed, you can customize the fields. This allows data to be replicated between Jira and Helix Core. To start:
- Download P4DTG.
- Open the Windows menu and search for “P4DTG Configuration.”
- Select P4DTG Configuration and run as administrator.
- Click New to add Jira as your Defecting Tracking Source. For example, “JiraCloud”.
- To connect to Jira Cloud, change the type to “JIRA-REST.”
- Enter the Jira Cloud server address –– https://<yoursitename>.atlassian.net.
- Use your own user name, or set one up specifically for this integration.
- To get your password API token, login as your Atlassian administrator account.
- Click Create and name your API token.
- Copy the token and paste it into the dialog box. A new token can be generated if needed.
- Click Check Connection to verify that Helix Core is connected to Jira.
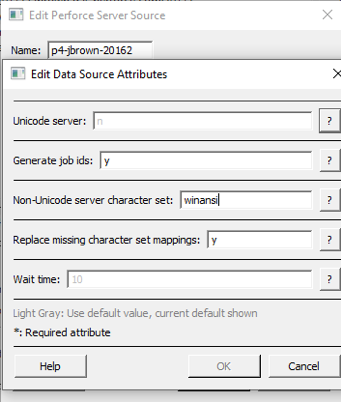
- On the Perforce Server Source tab, click New to enter the server info. After checking the connection, click Edit Attributes to adjust your settings.
Back to top
Map and Replicate Jira + Version Control Data
Now that specs have been configured, you can map Jobs’ fields to changelists’ fields.
- On the Gateway Mappings tab, name the mapping. Shorter names are better.
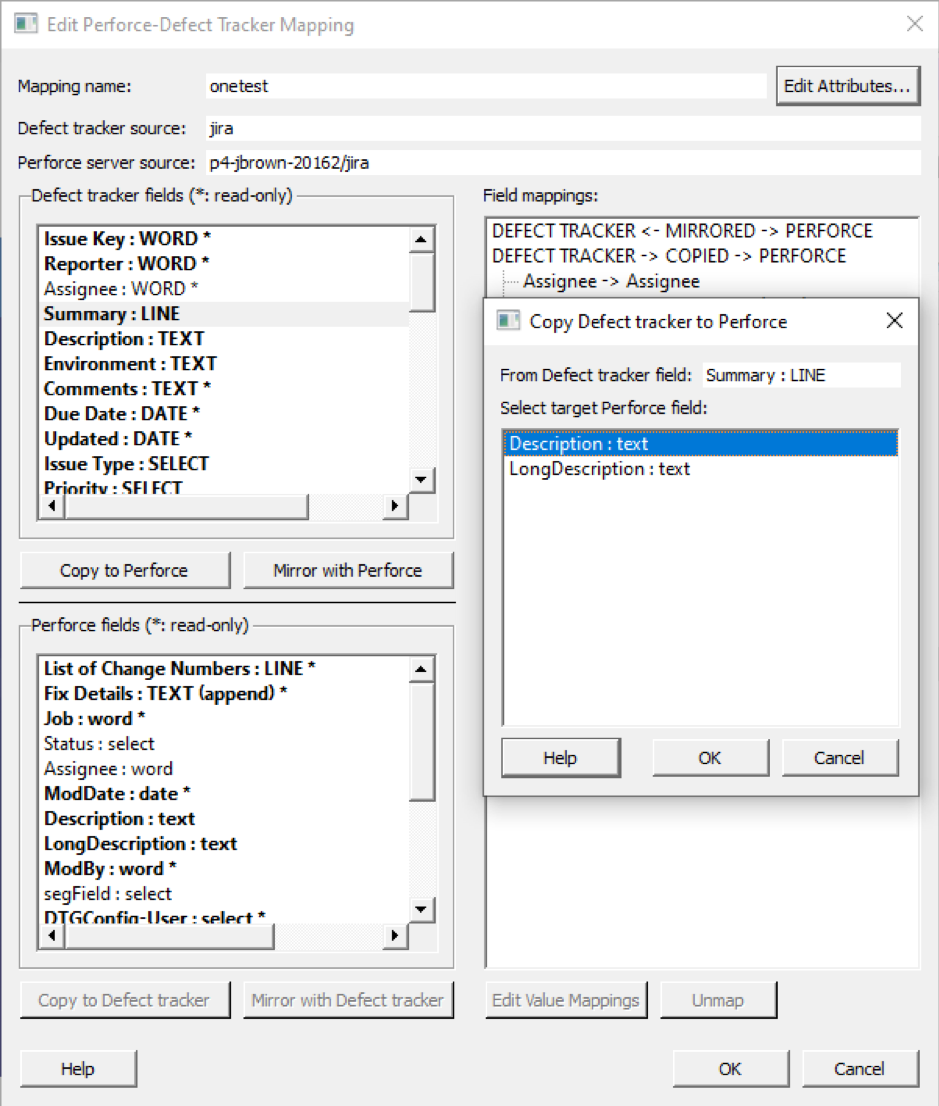
- Select each defect tracker field you want to copy to Jobs. Click Copy.
- Select the appropriate Helix Core Job fields in the presented dialog box. Click Copy.
- The special Helix Core field “Fix Details” represents a changelist’s details. Copy it back to Jira.
- Click Edit Attributes to set log level. We recommend setting it to level 3 until you successfully get your replication working. NOTE: The Polling Period represents how often the server queries Jira for modified issues and jobs.
The following is an example linking the Jira Summary field to the Job Description field.
Now that you have completed the configuration of P4DTG, new issues in Jira will be replicated into Helix Core jobs. The updated job information will then be replicated back to Jira.
When a developer checks code into Helix Core, metadata can be propagated into Jira so everyone on your team can see it. Scrum masters and product managers gain visibility into work being completed. Now they can quickly know if the status of the work item changes, allowing them to react fast.
More Perforce + Jira Integrations
Related Resources
Back to topGet Started With Helix Core For Jira
Get more done with Helix Core for Jira version control.