Blog
January 14, 2020
Design Validation vs Design Verification for Med Device Development

Application Lifecycle Management
If you develop products — medical devices, particularly — then you’ve heard the terms and design verification and validation (also called V&V). Here we’ll explain what the two activities are, the difference between them, plus share tips for getting the most out of your efforts.
Note: To verify and validate this content, we connected with Megan Martin, a medical device consultant with over 30 years of experience in medical device V&V, medical device software, product and software quality, and U.S. and international device regulatory submissions. You’ll find her insights and examples throughout.
Follow along or skip to the section that interests you most:
See Solutions for Med Device Development
Back to top
What's the Difference Between Validation vs Verification?
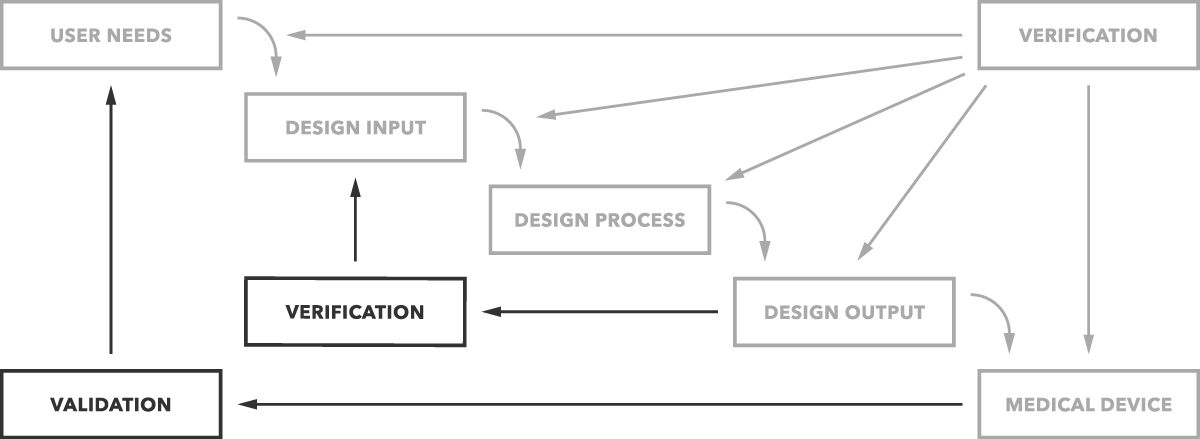
What's the difference between validation and verification? Put simply, validation determines if you are building the right product. Does the device work as intended for the end users? Verification determines if you’re building the product right. Are design outputs matching design inputs?
That’s the simple difference as clearly depicted in the graph below.
Let's look more closely at each phase more closely, starting with validation.
Struggling with complex FDA regulations for medical device development?
👀 Read the blog about medical device design controls >>
Back to top
What Is Design Validation Exactly?
Design validation is a testing process by which you prove (“validate”) that the device you’ve built works for the end user as intended.
Official word from the FDA (21 CFR 820.3) states that design validation is “establishing by objective evidence that device specifications conform with user needs and intended use(s).”
Design Validation Example
Let’s imagine we’re building a ventilator that keeps a patient breathing, and that the user wants to ensure it works during patient transport.
First, we must define our user needs. The user wants to move patients while they are on the ventilator. But what are they actually trying to do? “Transport” might include moving the patient within the hospital. Or might include transport via ambulance or by air. A user need, for example, might look like the following.
User Need
| UsNe-0001 | The ventilator is suitable for use during in-hospital transport of patients. |
This user need will be broken down into product requirements and design specifications in order to design and build the product. (We’ll look at those in a moment under design verification.)
Before that, let’s examine our user need and see what design validation test cases might be required. Validation testing of our user need might look like this.
| User Need | Validation Test | ||
|---|---|---|---|
| UsNe-0001 | The ventilator is suitable for use during in-hospital transport of patients. | TCase-0001 | Validation Test Suite: Test that the ventilator can be rolled easily by 15 members of hospital transport staff. |
| TCase-0002 | Validation Test Suite: Test that the ventilator operates within its specifications while being rolled down hallways, over door jams, and over elevator thresholds. | ||
| TCase-0003 | Validation Test Suite: Test that the ventilator operates within its specifications while transitioning between AC power and battery operation. | ||
Validation testing would include test cases, test suites, or even clinical trials designed to prove that the product, as built, operates according to the user’s expectations under the conditions where they intend to use it. Since these tests should be run on production or production equivalent units, design validation tests are often the last tests performed.
Basically, in design validation, we need to demonstrate that the product meets the user’s needs.
By the way, the table above also shows the traceability between user needs and test cases. This trace matrix provides part of the V&V evidence that the FDA requires.
Need to trace medical device requirements to prove compliance?
📘 Get the White Paper: 5 Steps to Medical Device Traceability >>
Back to top
What Is Design Verification for FDA?
Design verification is where you test (“verify”) that your design outputs match your design inputs.
Again, according to the FDA, design verification is “confirmation by examination and provision of objective evidence that specified requirements have been fulfilled.”
Keep in mind that while it will involve testing, there are other acceptable verification activities.
They can include tests, inspections, and analyses (for more on this, check out FDA Design Control Guidance).
Design Verification Example
Let’s return to our ventilator example. We’ve identified our user needs; now let’s identify what the device has to do and how it has to do it.
To achieve that, we need to define specific product requirements. For instance:
- What’s maximum load for a patient? (How much air does the ventilator need to move?)
- How long does the battery need to last? (How long does transport take?)
- What conditions will they encounter during transport? (Door jams? Elevators?)
- Are there any regulatory standards that need to be met? (Safety standards?)
“Clear, complete, unambiguous, testable requirements are a key component in a successful development project. Inadequate requirements lead to wasted time, design errors, extensive rework, and fragile or error-prone products.” –Megan Martin, V&V Consultant
This is the “what” part of defining device characteristics. What exactly will the device need to do? Product requirements (often included in a product requirements document) for our user need might look like below.
Product Requirements
| PrRq-0001 | The ventilator shall have a maximum setting of 2-liter volume-controlled breaths at 20 breaths per minute. |
| PrRq-0002 | The ventilator shall run on battery power at maximum settings for a minimum of 90 minutes. |
| PrRq-0003 | The ventilator shall be able to be mounted on a rolling support stand. |
| PrRq-0004 | The ventilator and stand shall be able to traverse typical hospital door and elevator thresholds. |
Finally, we need design specification. "We've already defined what we’re going to achieve, and now we need to define how we’re going to do it,” says Megan. This can be accomplished in a variety of ways, including written specifications, electrical or mechanical drawings, component purchasing specifications, or other methods.
For instance, the design specifications and drawings might show the following.
Design Specifications
| DSpec-0001 | A turbine that can generate up to 40 liters of air per minute. |
| DSpec-0002 | A lithium ion battery pack rated for at least 100 Amp Hours. |
| DSpec-0003 | The mount for the rolling stand uses a steel lever-action clamp rated for 22 lbs. |
| DSpec-0004 | The stand base is 22” wide with 5 wheels. |
| DSpec-0005 | The stand wheels have a 4” diameter. |
Design verification provides evidence (test results) that the design outputs (actual product) meet the design inputs (product requirements and design specifications). Depending on the item being verified, a test case or test suite would be run, or an inspection or analysis done to provide the required evidence.
The tables below illustrate how that might look. They also show the traceability the FDA expects.
| Product Requirement | Verification Test | ||
|---|---|---|---|
| PrRq-0001 | The ventilator shall have a maximum setting of 2-liter volume-controlled breaths at 20 breaths per minute. | TCase-0004 | Test case: Verify maximum breath settings or combinations of breath settings. |
| PrRq-0002 | The ventilator shall run on battery power at maximum settings for a minimum of 90 minutes. | TCase-0005 | Test suite: Verify run-time on maximum settings with a fully charged new battery. |
| TCase-0006 | Test suite: Verify run-time on maximum settings with a battery that has been through 50 charge cycles. | ||
| PrRq-0003 | The ventilator shall be able to be mounted on a rolling support stand. | TCase-0007 | Demonstration Test: Demonstrate that the ventilator can be attached and detached from the rolling stand. |
| PrRq-0004 | The ventilator and stand shall be able to traverse typical hospital door and elevator thresholds. | TCase-0008 | External Test: Test executed by a testing service to verify ventilator and stand can be rolled over a threshold without tipping per IEC 60601-1 Medical Electrical Standard. |
Verification of the product requirements, as above, shows that the product does what we said it would do.
Verification of the design specifications, which we'll show next, shows that the product does it the way we said it would do it.
| Design Specification | Verification Test | |||
|---|---|---|---|---|
| DSpec-0001 | A turbine that can generate 40 liters of air per minute. | TCase-0009 | Test Suite: Verify air generation by turbine at 40 lpm on either AC power or battery power. | |
| DSpec-0002 | A lithium ion battery pack rated for 100 Amp Hours. | TCase-0010 | Inspection Test: Verify battery purchasing spec shows type is lithium ion. | |
| TCase-0011 | Analysis Test: Collect test data and do data analysis to demonstrate battery performance over the life of the battery will meet or exceed 100 Amp Hours. | |||
| DSpec-0003 | The mount for the rolling stand uses a steel lever-action clamp rated for 22 lbs. | TCase-0012 | Inspection Test: Verify part specification is for a steel lever-action clamp rated for 22 lbs or more. | |
| DSpec-0004 | The stand base is 22” wide with 5 wheels. | TCase-0013 | Test Case: Measure base diameter; count wheels; measure wheel diameter | |
| DSpec-0005 | The stand wheels have a 4” diameter. | |||
Essentially, in design verification, we need to demonstrate that the product we built is the product we said we would build.
When collected together in a V&V Report, the combination of verification and validation test results, along with traceability back to user needs, product requirements, and design specifications, provides part of the evidence the FDA requires when submitting a medical device for clearance.
Back to top
Validation vs Verification Summary
Here’s a brief, if slightly oversimplified, summary of key differences.
| Design Verification | Design Validation |
| Design output is as expected. | Final design meets user’s needs. |
| System, subsystem and unit testing. | System testing. |
| During development. | After development. |
| Test individual module or completed system under any conditions. | Test conditions per user needs. |
| Includes system inspections, analysis, and testing. | Includes testing of production equivalent units under real-use conditions. |
| Includes reports of testing performed, test results, and traceability. Reports are reviewed, approved, and signed. | Includes final report, with test results and traceability, ready for regulatory review. Reports are reviewed, approved, and signed. |
Back to top
Basics of Design Validation Process
The design validation process will largely consist of testing the device. You can conduct this in a few ways, depending on circumstances. Activities can include:
- Comparing with similar equipment performing for similar purposes.
- Simulating functionality through mathematical modeling.
- Testing the final design to prove the system operates as defined in the user needs.
Test plan, test cases, test execution records, and test results should be documented and maintained as a part of design records. Validation, in its entirety, is not the result of a single activity, but the collection of results from all validation activities.
Back to top
Basics of Design Verification Process
Verification can be reduced to a simple five-step process.
Identifying and Preparing
Identify the best approach for conducting verification. Define what you will measure and how you will measure it. You’ll also want to consider the required resources, manpower, and tools for successful verification.
Planning
Planning for verification occurs throughout the project life cycle. You’ll develop the test plan, which captures critical milestones. The plan must be updated whenever changes are made to design inputs.
Developing
Product development begins! It’s conducted using the methodology of choice (Scrum, Waterfall, hybrid, etc.). This part of the process also includes writing, test driving, and approving the test cases that will be used for verification.
Executing
Test procedures are executed as planned. Any invalid results are documented and reviewed, and either accepted or logged as defects. Defects in the product are resolved and released, and regression testing is performed. A traceability matrix is created to verify that design inputs identified in the verification test plan have been tested and passed.
Reporting
Reporting is performed at the end of each phase of verification. Detailed reports include configuration management and release reports, test results by testing type or product version, and issues found during the verification activity. A design verification traceability report shows test results and coverage for the requirements. Finally, reviews are completed and approved after each design verification activity.
Back to top
6 Tips for Better Design Verification & Validation
Here are tips to make sure you get the most out of your design verification & validation.
1. Plan Ahead (And Test Early)
Have a solid plan upfront and loop everyone in. Include test engineers early in development planning to make sure requirements and design are clear, complete and testable. Says Megan, “Early development of test methods can shed light on technology issues before they become major obstacles.” Early test development can also provide test tools. These can then be used to speed the product development process as well as provide test evidence during formal testing.
2. Use Shared Nomenclature
Getting your team on the same page is critical to successful design validation & verification. Part of getting on the same page means using a shared terminology. Using the same terms eliminates confusion for team members (not just new members — veterans, too). See the glossary of terms and common acronyms below to help develop your foundation of terminology.
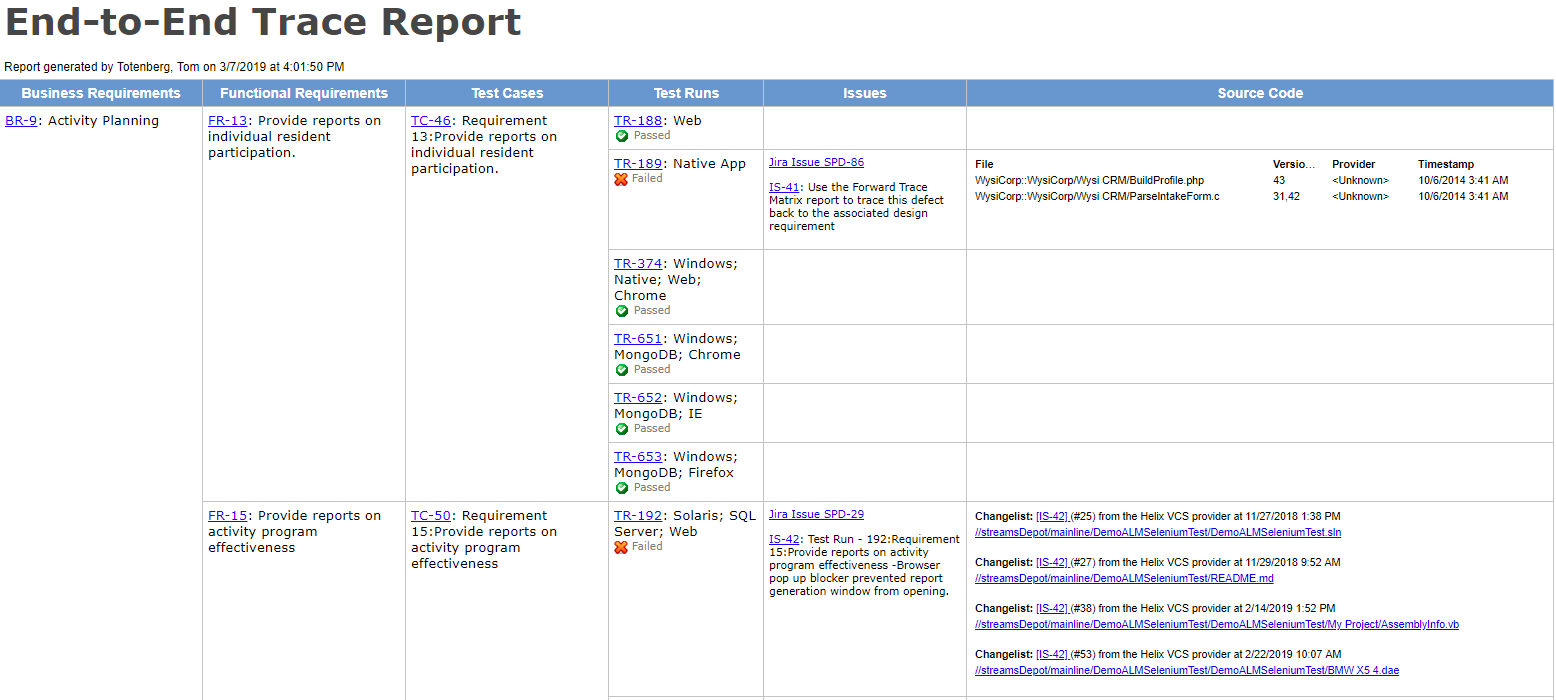
3. Use Tools With End-to-End Traceability
At its simplest, traceability can be achieved with word documents and spreadsheets, but they generate so much manual work (and are so error-prone) that you’ll wish you started with a dedicated tool.
“An accurate trace matrix is invaluable when doing regression analysis to determine what should be retested after a product change or a bug fix.” –Megan Martin, V&V Consultant
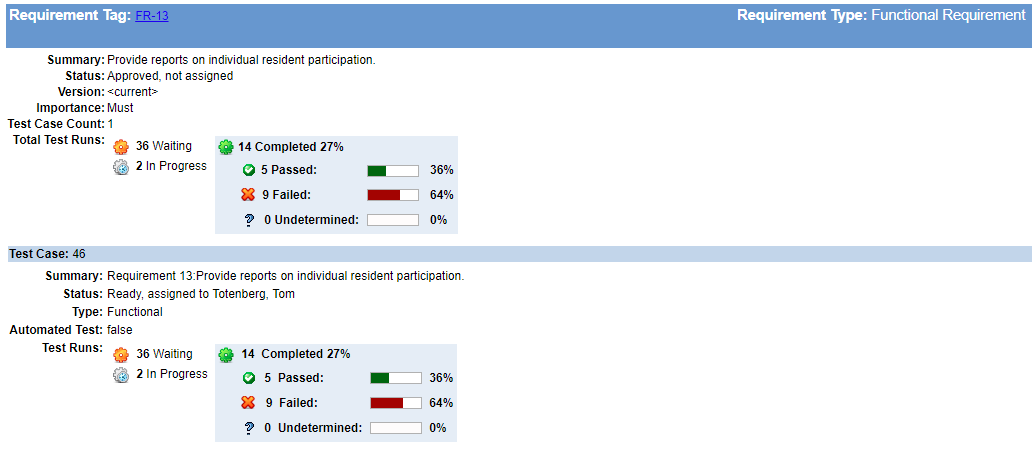
Using a tool with strong requirements-to-test-to-results trace capability will help you identify holes in coverage and give early warnings on fragile or untested areas in the product.
4. Build Your Trace Matrix As You Go
“It can be tempting to put it off, but don’t wait to build your trace matrix.” says Megan. Building your traceability as you go will keep holes from developing unnoticed. Few things are harder to recover from than discovering you’ve missed critical requirements, risk-mitigating features, or essential tests just when you think your development work is complete.
It takes much less maintenance effort to maintain traceability as your requirements, designs, and tests evolve than it does to patch critical holes in design and development at the 11th hour. This effort can also help you identify how much work is left, where you might need to add development or test staff, or when you should re-evaluate delivery schedules.
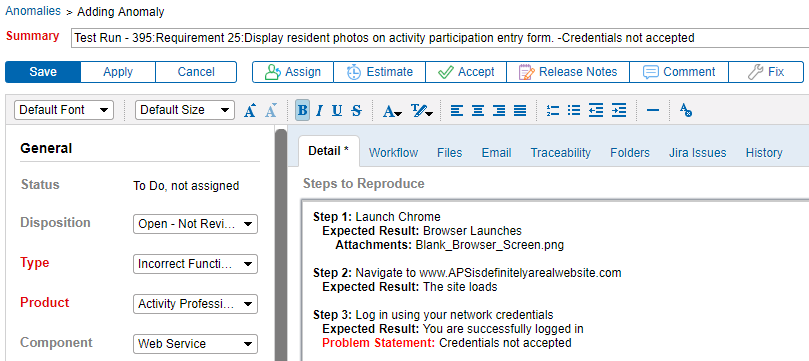
5. Integrate Requirements Traceability & Testing with Anomaly Tracking
Being able to link anomalies directly to a requirement improves communication between testers and developers. It is extremely helpful. Generating anomalies directly from a test protocol failure means that more detail about the issue is captured. As a result, problems can be more easily documented, reproduced, fixed, and retested.
6. Choose Tools You Can Customize to Your Method
“Whatever development model you’ve selected — Agile, iterative, modified Waterfall — you want to choose V&V tools that serve you by adapting to your process, rather than forcing you to adapt your process to serve the tool,” advises Megan.
The medical device development tools you choose should add to the accuracy and effectiveness of the work your team is doing and not add unnecessary overhead to their daily tasks. A good tool provides guard rails to ensure that the important tasks are always completed. It gives your team flexibility to produce ad hoc views and reports to better use (and explore) the data you’ve captured. It provides V&V targeted data capture and reporting to make production of reports simple and repeatable.
Take time to define how you want tools to support your team before you choose. Then get your tools configured to your team’s needs.
Back to top
Bringing It All Together
Design validation and verification are essential components of successful device development. With shared understanding among the team, as well as the right tools, you have solid framework for getting your device to market.
Again, thanks to V & V expert Megan Martin who provided invaluable insight to this blog!
Back to top
V&V: Glossary of Terms
Actual Result – What a system actually does when an action is performed.
Anomaly – When a system does not act as expected. For example, a bug, error, or test failure.
Deliverable – An obligatory object produced as a result of project execution, usually documents in validation efforts.
Deviation – When a process or procedure cannot be executed as defined, and an alternate method or material is used.
Expected Result – What a system should do when an action is performed.
Integration Test – Testing conducted using two or more subsystems to verify interaction and interdependencies of the subsystems.
Protocol – A collection of test cases used to document system testing.
Qualification – A testing protocol designating that a system meets a defined collection of requirements.
Quality Assurance – Team members tasked with ensuring product quality or process integrity.
Requirement – Something a system must be able to do.
Retrospective Validation – Validation of a system that already exists.
Specification – A document outlining the requirements for a system or component.
Subsystem Test – Testing conducted on a major subsystem or group of components.
System – The thing undergoing validation.
System Owner – The individual who is ultimately responsible for a system.
System Test – Testing conducted using the system as a whole.
Test Case – A documented procedure, used to test that a system meets a requirement or collection of requirements.
Test Plan – A testing methodology established to ensure a system meets requirements.
Test Step – An individual line of a test case. It should include instructions, expected result, and actual result.
Traceability – The ability to ensure that requirements outlined in the specifications have been tested. Often captured in a requirements traceability matrix.
Unit Test – Testing conducted on a software or hardware unit or low-level module.
Validation – Establishing by objective evidence that device specifications conform with user needs and intended use(s).
Validation Package – A collection of documents produced during a validation project.
Verification – confirmation by examination and provision of objective evidence that specified requirements have been fulfilled.
V&V Plan – A plan defining the requirements to be verified and validated, and the manpower, responsible individuals, tools, methods, resources, and schedule for the V&V effort.
Common Design Validation Acronyms
CC – Change Control
CCB – Change Control Board (a group of individuals who control what changes are made and when)
DS – Design Specification
FAT – Factory Acceptance Testing
FS – Functional Specification
FRS – Functional Requirement Specification (See Functional Specification)
GCP – Good Clinical Practice (quality guidelines for clinical operations)
GLP – Good Laboratory Practice (quality guidelines for pharmaceutical laboratory operations)
GMP – Good Manufacturing Practice (quality guidelines for manufacturing of devices or pharmaceuticals)
RTM – Requirement Traceability Matrix
SAD – Software Architecture Document or System Architecture Document
SAT – Site Acceptance Testing
SCCB – Software Change Control Board (same as CCB, but for software)
SDD – Software Detail Design Document
SDS – Software Design Specification
Spec – Specification
SRS – Software Requirements Specification
TM – Traceability Matrix
UAT – User Acceptance Testing
URS – User Requirement Specification
UUT – Unit Under Test
VMP – Validation Master Plan
VP – Validation Plan
V&V – Verification and Validation